Manuals

clutch diagram for a manual transmission

A manual transmission and clutch system enable drivers to control gear shifts, essential for precise vehicle operation. The clutch connects and disconnects the engine from the transmission, allowing smooth gear transitions. Understanding the clutch diagram helps visualize components like the flywheel, pressure plate, and clutch plate, simplifying maintenance and repair processes.

1.1 Overview of Manual Transmission

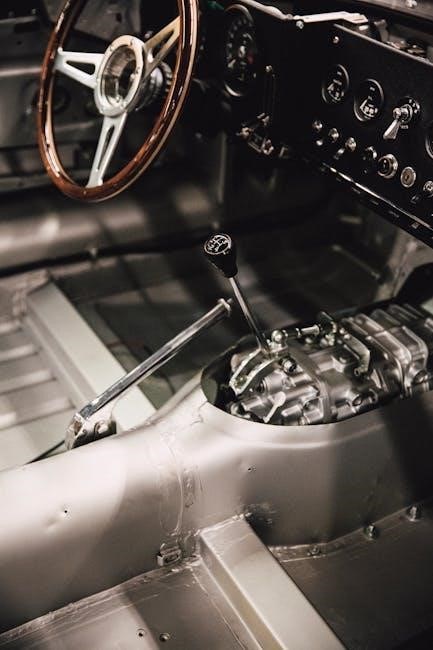
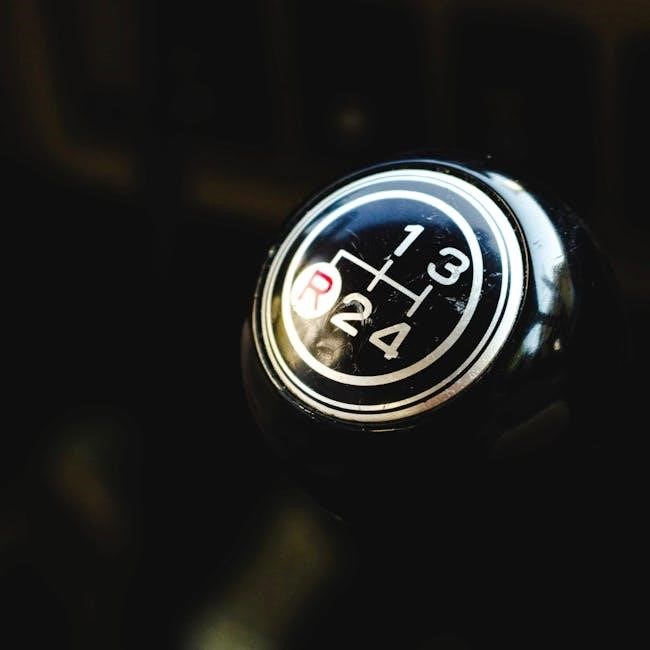
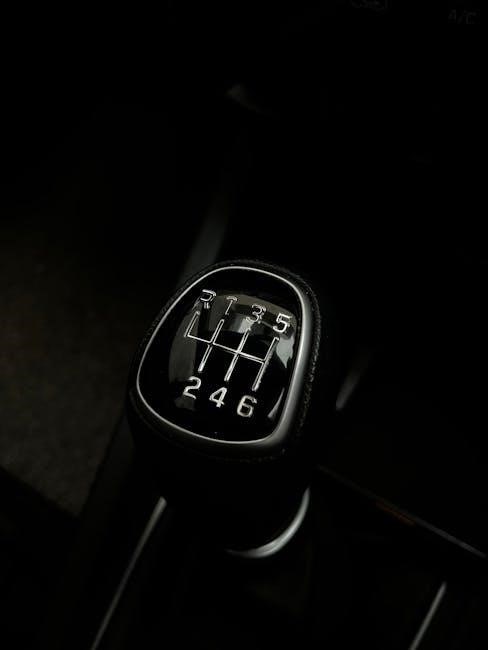
A manual transmission, or stick shift, allows drivers to manually change gears using a clutch pedal and gear shifter. It provides precise control over power delivery, enabling efficient acceleration and smooth transitions between speeds. The system mechanically connects the engine to the transmission, requiring driver input to engage or disengage gears, ensuring optimal performance and fuel efficiency in various driving conditions.

1.2 Importance of the Clutch in Manual Transmission

The clutch is essential for smooth gear transitions in manual transmissions. It temporarily disconnects the engine from the transmission, allowing precise control over acceleration and deceleration. This prevents wear on transmission components and enables efficient power delivery, especially in demanding driving conditions like hills or towing, making it crucial for optimal vehicle performance and longevity.

Components of the Clutch System

The clutch system comprises key components like the flywheel, clutch plate, pressure plate, and clutch pedal. These parts work together to engage and disengage engine power smoothly.

2.1 Flywheel

The flywheel is a crucial component in the clutch system, bolted directly to the engine’s crankshaft. It rotates with the engine, providing a smooth surface for the clutch plate to engage. Its primary function is to store energy and ensure consistent engine power transmission to the manual transmission when the clutch is engaged, minimizing vibrations and ensuring smooth operation.

2.2 Clutch Plate

The clutch plate, also known as the friction plate, is a key component in the clutch system. It is designed to engage with the flywheel when the clutch pedal is released, transferring power from the engine to the transmission. The clutch plate is typically made of friction material, ensuring a secure connection while minimizing wear and tear. Proper alignment and condition are essential for smooth operation.

2.3 Pressure Plate

The pressure plate is a crucial component that bolts to the flywheel and holds the clutch plate in place. When the clutch pedal is pressed, it releases tension, disengaging the clutch. The pressure plate ensures the clutch plate presses securely against the flywheel, enabling power transfer. Its springs maintain constant pressure, ensuring smooth engagement and disengagement of the clutch system. Regular inspection is necessary for optimal performance.

2.4 Clutch Pedal and Linkage

The clutch pedal and linkage system enables the driver to engage and disengage the clutch smoothly. Pressing the pedal down disengages the clutch, while releasing it engages the clutch. The linkage, whether mechanical or hydraulic, connects the pedal to the clutch fork, ensuring precise control. Proper alignment and adjustment are critical to prevent wear and ensure smooth operation.

How the Clutch System Works

The clutch system connects and disconnects the engine from the transmission. Pressing the clutch pedal disengages the clutch, allowing smooth gear shifts. Releasing it restores power flow efficiently.

3.1 Engaging the Clutch

Engaging the clutch involves pressing the pedal, which disengages the engine from the transmission. Slowly releasing the pedal connects the engine to the transmission, allowing power transfer. The pressure plate clamps the clutch disc to the flywheel, enabling smooth acceleration and gear transitions. Proper clutch engagement is crucial for efficient driving and preventing wear on components.

3.2 Disengaging the Clutch

Disengaging the clutch occurs when the pedal is pressed, separating the engine from the transmission. This allows the engine to rotate independently, enabling gear changes without resistance. The clutch disc releases from the flywheel, halting power transfer temporarily. Proper disengagement ensures smooth shifting and prevents grinding gears, maintaining system longevity and performance efficiency during manual transmission operation.

3.3 Transmission of Power

When the clutch is fully engaged, the clutch plate presses against the flywheel, establishing a direct connection between the engine and transmission. This allows engine power to flow through the gears to the wheels, enabling the vehicle to move. The transmission uses gears to adjust speed and torque, ensuring efficient power delivery based on driving conditions and driver input.

Types of Clutch Systems

Clutch systems vary, including single-plate for simplicity, multi-plate for high performance, and hydraulic vs. cable-actuated for different actuation methods, each offering unique advantages depending on vehicle needs.

4.1 Single-Plate Clutch

A single-plate clutch is the most common type, featuring one friction plate between the flywheel and pressure plate. It is simple, lightweight, and cost-effective, making it ideal for most manual transmissions. The clutch plate engages directly with the flywheel, providing smooth power transfer. Its straightforward design ensures reliability and ease of maintenance, making it a popular choice for everyday vehicles.

4.2 Multi-Plate Clutch

A multi-plate clutch uses multiple friction plates stacked within a housing, increasing surface contact and friction. This design enhances heat dissipation and torque capacity, making it suitable for high-performance vehicles. Multi-plate clutches are commonly found in racing cars and heavy-duty applications, offering better control and durability under extreme conditions compared to single-plate clutches.

4.3 Hydraulic vs. Cable-Actuated Clutch

Hydraulic clutches use fluid pressure to engage and disengage, offering smooth, consistent operation. Cable-actuated systems rely on a physical cable, providing a more direct feel. Hydraulic systems are less prone to wear and require less maintenance, while cable systems are simpler and lighter. Modern innovations, like clutch-by-wire technology, eliminate the clutch pedal entirely, as seen in Hyundai and Kia’s intelligent Manual Transmission (iMT) systems.

Manual vs. Automatic Transmission

Manual transmissions require driver engagement with a clutch pedal for gear shifts, offering control and efficiency. Automatic transmissions operate without manual intervention, prioritizing convenience over driver involvement.

5.1 Key Differences

Manual transmissions involve a clutch pedal for driver-controlled gear shifts, offering better fuel efficiency and driver engagement. Automatic transmissions rely on torque converters for seamless shifting without manual input, prioritizing convenience. Manuals typically have lower production costs and higher performance, while automatics provide ease of use, especially in traffic. Both systems have distinct advantages tailored to different driving preferences and conditions.

5.2 Advantages of Manual Transmission

Manual transmissions offer better fuel efficiency, lower production costs, and higher performance. They provide drivers with more control and engagement, making the driving experience more enjoyable. Manuals typically require less maintenance than automatics and are lighter, improving acceleration. These advantages make manual transmissions popular among driving enthusiasts and those seeking cost-effective, reliable vehicles for both urban and highway driving conditions.

5.3 Disadvantages of Manual Transmission

Manual transmissions require constant driver engagement, involving frequent use of the clutch and gear shifter. This can be tiring in heavy traffic and may lead to driver fatigue. Additionally, manuals have a steeper learning curve, making them less accessible for new drivers. They also lack the convenience of automatic transmissions, particularly in stop-and-go situations, where manual shifting can become cumbersome and stressful.

The Role of the Flywheel in the Clutch System

The flywheel is attached to the engine’s crankshaft and plays a crucial role in the clutch system by providing a smooth surface for the clutch plate to engage with, ensuring efficient power transmission to the manual transmission.

6.1 Function of the Flywheel

The flywheel, bolted to the engine’s crankshaft, stores rotational energy from the engine, ensuring smooth operation during gear shifts. It provides a stable mounting surface for the clutch assembly, facilitating consistent engagement and disengagement. By maintaining rotational inertia, the flywheel helps stabilize engine speed, making acceleration smoother and more controlled during clutch operations in a manual transmission system.

6.2 Flywheel Maintenance

Regular inspection of the flywheel is crucial to ensure optimal performance. Visual checks for wear, cracks, or excessive heat damage are essential. Resurfacing or replacing the flywheel when necessary prevents clutch slippage and ensures smooth engagement. Cleaning the flywheel surface from debris and contaminants also maintains proper clutch function. Proper maintenance extends the lifespan of both the flywheel and clutch assembly, ensuring reliable transmission operation.

Clutch Diagram: Visual Representation

A clutch diagram illustrates the components and their interactions, such as the flywheel, pressure plate, and clutch plate. It provides a clear visual guide for understanding the system’s operation and aiding in diagnostics and repairs.

7.1 Labels and Symbols in a Clutch Diagram

A clutch diagram uses specific labels and symbols to identify components like the flywheel, clutch plate, and pressure plate. These elements are often color-coded or annotated to clarify their functions and connections. Symbols may represent mechanical linkages or hydraulic systems, ensuring clarity for technicians and enthusiasts alike. Understanding these labels aids in diagnosing issues and performing repairs effectively.

7.2 Understanding the Layout

A clutch diagram’s layout visually connects components, showing their relationships. The flywheel is central, attached to the engine’s crankshaft. The clutch plate and pressure plate are adjacent, with the clutch pedal linkage on the driver’s side. This arrangement illustrates how pressing the pedal disengages the clutch, allowing gear shifts. The layout clarifies power flow from the engine to the transmission.

Modern Advances in Clutch Technology

Modern clutch systems feature intelligent manual transmission (iMT) and clutch-by-wire technology, enhancing driver control and efficiency. These innovations simplify gear shifting and reduce pedal fatigue, improving overall performance.

8.1 Intelligent Manual Transmission (iMT)

Intelligent Manual Transmission (iMT) combines traditional manual shifting with advanced electronics. It eliminates the clutch pedal, using sensors and actuators to engage and disengage the clutch automatically, offering a seamless driving experience while maintaining the feel of manual control. This technology enhances fuel efficiency and reduces driver fatigue, making it a modern twist on classic manual transmissions.

8.2 Clutch-by-Wire Technology

Clutch-by-wire technology replaces traditional mechanical linkages with electronic sensors and actuators, enhancing precision and control. This system allows for smoother and faster clutch engagement, reducing wear and tear. It integrates seamlessly with modern transmissions, providing real-time feedback and improving overall driving efficiency while maintaining the responsiveness of a manual clutch system.

Common Issues with the Clutch System

Common issues include clutch wear, slippage, and failure, often causing difficulty in shifting gears or unusual noises. Understanding the clutch diagram aids in diagnosing these problems effectively.

9.1 Symptoms of a Failing Clutch

Common symptoms of a failing clutch include difficulty shifting gears, a slipping clutch, unusual noises during gear changes, and vibrations when accelerating. Drivers may also experience a spongy or loose clutch pedal. If ignored, these issues can lead to complete clutch failure, requiring costly repairs. Early detection is crucial to prevent further damage to the transmission system.

9.2 Troubleshooting Clutch Problems

Troubleshooting clutch issues involves inspecting components like the pedal linkage, master and slave cylinders, and clutch disc. Leaks in the hydraulic system or worn-out bearings can cause problems. Using a clutch diagram helps identify faulty parts. Testing the clutch pedal for proper engagement and checking for unusual noises aids in diagnosing issues effectively before they escalate into major repairs.

Maintenance and Repair of the Clutch

Regular inspection of the clutch system ensures optimal performance. Lubricating components and adjusting the clutch pedal prevents wear. Replacing worn parts promptly avoids costly repairs.

10.1 When to Replace the Clutch

The clutch should be replaced when it shows signs of wear, such as slipping, noise, or difficulty shifting gears. If the clutch plate or pressure plate is worn beyond specifications, replacement is necessary. Additionally, if the clutch pedal feels spongy or lacks resistance, it may indicate a failing clutch assembly, requiring immediate attention to prevent further damage to the transmission system.

10.2 DIY vs. Professional Repair

DIY clutch repair can be cost-effective for experienced individuals but requires mechanical expertise and specialized tools. However, improper installation can lead to further damage. Professional repair ensures precision and reliability, especially for complex systems. Consulting a mechanic is recommended for those without hands-on experience to avoid costly mistakes and ensure optimal performance of the clutch and transmission system.

The Future of Manual Transmission

Manual transmissions face declining popularity but remain relevant with innovations like intelligent Manual Transmission (iMT) and clutch-by-wire technology, offering improved efficiency and driver control in modern vehicles.

11.1 Decline in Popularity

Manual transmissions are becoming less popular as automatic and automated transmissions gain favor. Modern drivers prioritize convenience, leading automakers to focus on easier-to-use alternatives. However, enthusiasts still value the control and connection manual transmissions provide, keeping them relevant in niche markets despite their decline in mainstream vehicles over the past decade.

11.2 Innovations to Revive Manual Transmissions

Innovations like intelligent Manual Transmission (iMT) and clutch-by-wire technology aim to modernize manual transmissions. These systems simplify shifting by eliminating the clutch pedal, appealing to new drivers while retaining the driving experience. Such advancements could revitalize interest in manual transmissions, blending tradition with modern convenience to attract a younger generation of car enthusiasts.

12.1 Summary of Key Points

A manual transmission and clutch system are essential for connecting and disconnecting the engine from the transmission. The clutch diagram illustrates components like the flywheel, clutch plate, and pressure plate. Understanding their roles aids in troubleshooting and maintenance. Proper engagement, disengagement, and power transmission ensure smooth operation. Regular maintenance is vital for longevity and performance, making the clutch diagram an invaluable resource for drivers and mechanics alike.

12.2 Final Thoughts on the Clutch Diagram

A clutch diagram is an invaluable tool for understanding manual transmission systems. It visually represents components like the flywheel, clutch plate, and pressure plate, aiding in diagnostics and repairs. By studying the diagram, drivers and mechanics gain insights into how the clutch engages and disengages, ensuring smoother gear shifts and optimal vehicle performance. This visual guide enhances both maintenance and driving efficiency, making it an essential resource for anyone working with manual transmissions.

Manuals

oster 22 quart roaster oven instruction manual

Overview of the Oster 22 Quart Roaster Oven

The Oster 22 Quart Roaster Oven is a versatile kitchen appliance designed for roasting, baking, and warming large meals. Its self-basting lid ensures moist results, while the spacious interior accommodates turkeys, roasts, and more. Perfect for holidays or special occasions, it offers even cooking and easy cleanup, making it a practical addition to any kitchen.

1.1 Key Features and Benefits

The Oster 22 Quart Roaster Oven features a self-basting lid for moist, flavorful results and a large capacity ideal for turkeys or roasts. It offers precise temperature control, ensuring even cooking. The oven is versatile for roasting, baking, and keeping food warm. Easy cleanup and durable construction make it a practical choice for home cooks. Its compact design saves kitchen space while delivering professional-grade performance for delicious, stress-free meals.

1.2 Design and Construction

The Oster 22 Quart Roaster Oven features a durable stainless steel exterior and a robust, heavy-duty steel roasting pan. Its compact design saves space while accommodating large meals. The self-basting lid is designed to circulate moisture for even cooking without manual basting. Ergonomic, heat-resistant handles ensure safe transport and handling. The oven’s construction emphasizes durability and ease of use, making it a reliable choice for home kitchens. Its sleek design complements any kitchen decor.

Safety Precautions

Always use handles to avoid burns and prevent electrical shock. Never immerse the base in water or operate with a damaged cord. Follow manual guidelines carefully.

2.1 General Safety Guidelines

Always preheat the oven before first use and avoid touching hot surfaces. Keep the roaster out of children’s reach. Never operate with a damaged cord or plug. Ensure the oven is placed on a stable, heat-resistant surface. Avoid using abrasive cleaners that could damage the finish. Regularly inspect the appliance for wear and tear. Follow all instructions carefully to ensure safe and efficient operation.

2.2 Electrical Safety Tips

Ensure the roaster oven is placed on a dry, stable surface away from water to prevent electrical shock. Avoid using damaged cords or plugs, as they can pose serious safety risks. Never submerge the appliance in water or expose it to excessive moisture. Keep the cord away from hot surfaces and avoid overloading electrical circuits. Always unplug the oven when not in use and ensure the outlet is grounded. Use a dedicated circuit if possible to prevent electrical issues.

2.3 Handling and Storage Safety

Always handle the roaster oven with care, especially when it’s hot. Use oven mitts or handles to avoid burns. After use, allow the oven to cool completely before cleaning or storing. Store the appliance in a dry, secure location, out of children’s reach. Ensure all components, including the lid and pan, are properly secured during transport or storage to prevent accidental damage or injury. Regularly inspect for wear and tear before each use.

Setting Up and Initial Use

Unpack and clean the roaster oven before first use. Place it on a stable, heat-resistant surface. Plug in and preheat to ensure proper initial operation. Refer to the guide for detailed setup instructions.

3.1 Unpacking and Cleaning Before First Use

Begin by carefully unpacking the roaster oven and inspecting for any damage. Wash the removable roasting pan, rack, and lid with warm soapy water. Rinse thoroughly and dry. Avoid using abrasive cleaners or scourers to prevent scratching. Wipe the exterior with a damp cloth. Ensure all parts are clean and dry before first use to maintain hygiene and prevent any residual odors during cooking.

3.2 Placement and Installation

Place the roaster oven on a heat-resistant, stable surface, away from flammable materials. Ensure adequate clearance around the unit for proper airflow. Position the oven on a flat surface, avoiding uneven or slanted areas. Plug the appliance into a 120-volt AC outlet, keeping the cord away from hot surfaces. Do not use an extension cord, as it may pose a fire hazard. Ensure the oven is at least 8 inches away from walls or other objects for safe operation.

3.3 First-Time Operation Guide

Before first use, unpack and clean the roaster oven thoroughly. Place the removable roasting pan inside the oven body. Ensure the temperature control is in the OFF position, then plug the cord into a 120-volt AC outlet. Turn the temperature control to the desired setting and preheat for 15-20 minutes. Test the oven by adding water to the pan to ensure it heats properly. Follow all safety guidelines during initial operation.

Operating the Roaster Oven

Place the removable roasting pan inside the oven body. Set the temperature control to the desired setting and preheat for 15-20 minutes. Add food to the pan, cover with the self-basting lid, and cook as per your recipe. Ensure the oven is placed on a heat-resistant surface and always use oven mitts when handling hot components.

4.1 Basic Operation Steps

Place the removable roasting pan inside the oven body. Set the temperature control to the desired setting and preheat for 15-20 minutes. Add food to the pan, ensuring it does not overflow. Cover with the self-basting lid to retain moisture. Turn the temperature control to the appropriate setting for your recipe. Use oven mitts when handling hot components. Keep the oven on a heat-resistant surface for safe operation.

4.2 Using the Self-Basting Lid

The self-basting lid is designed to circulate moisture, ensuring tender and flavorful results. Place the lid securely on the roaster oven during cooking to trap steam and distribute it evenly. For optimal performance, avoid opening the lid frequently. After use, clean the lid thoroughly with mild detergent to maintain its effectiveness. Regular maintenance ensures consistent basting performance for delicious dishes every time.

4.3 Temperature Control and Settings

Adjust the temperature control knob to set your desired heat level, ranging from 150°F to 450°F. Preheat for 15-20 minutes before cooking for even heat distribution. Use the lower settings for defrosting or keeping dishes warm, while higher settings are ideal for roasting and baking. Always refer to the manual for specific temperature recommendations to achieve perfect results for various recipes. Proper temperature control ensures consistent cooking performance.

Cooking Techniques and Recipes

The Oster 22 Quart Roaster Oven excels at roasting meats, poultry, and vegetables, delivering moist and flavorful results. Use the self-basting lid for even browning and tender textures. Perfect for holiday feasts or everyday meals, it accommodates large dishes with ease. Try recipes like roasted turkeys, slow-cooked stews, or baked casseroles for delicious, stress-free cooking. Achieve professional-grade results with minimal effort. Moisture retention is exceptional, ensuring tasty outcomes. Versatile for roasting, baking, or keeping food warm. Ideal for hosting gatherings or preparing hearty family dinners. Explore a variety of recipes to maximize your cooking experience with this versatile appliance. Great for roasting, baking, and warming, it ensures even cooking. Ideal for turkeys, roasts, and casseroles. The self-basting lid keeps food moist. Perfect for holidays or everyday meals. Easy to use for delicious, tender results.

5.1 General Cooking Tips

Preheat the Oster 22 Quart Roaster Oven to the desired temperature before cooking for even results. Use the self-basting lid to maintain moisture and flavor. For roasting, set temperatures between 325°F to 425°F, depending on the dish. Allow 15-20 minutes for preheating. Place food on the roasting rack for air circulation. Ideal for turkeys, roasts, and large meals. Follow recipe guidelines for precise cooking times and temperatures to achieve perfect doneness every time.

5.2 Specific Dishes and Recipes

The Oster 22 Quart Roaster Oven excels at cooking large meats like turkey, prime rib, and chicken. For a perfect turkey, roast at 375°F for 20 minutes per pound. Achieve tender results with beef or pork roasts by using the self-basting lid. Try baking casseroles, roasted vegetables, or even homemade bread. Experiment with recipes like herb-crusted lamb or garlic-infused ham for delicious, evenly cooked meals. Its versatility ensures perfect results for any dish.

5.3 Defrosting and Keeping Warm

The Oster 22 Quart Roaster Oven simplifies defrosting and keeping food warm. Defrost frozen meats evenly by placing them in the roaster pan on a low setting. Use the keep-warm function to maintain food at a safe temperature during gatherings. Ideal for buffet-style meals, it ensures dishes stay warm without overcooking. This feature is perfect for holiday entertaining, allowing you to serve delicious, perfectly heated meals with minimal effort. Easy to use and efficient, it enhances meal preparation and presentation.

Care and Cleaning

Regularly clean the Oster 22 Quart Roaster Oven with mild soap and water. Avoid abrasive cleaners to prevent damage. Dry thoroughly after cleaning to prevent rust. Store the roaster oven in a dry place when not in use. Clean the self-basting lid separately and ensure all parts are dry before storage for optimal maintenance.

6.1 Cleaning the Roaster Oven

Unplug the roaster oven and allow it to cool completely before cleaning. Remove the roasting rack and pan, washing them with mild soap and warm water. Wipe the oven body with a damp cloth, avoiding abrasive cleaners or scrubbers. Never submerge electrical components in water. Dry all parts thoroughly to prevent rust. For tough stains, soak the rack and pan before cleaning. Regular cleaning ensures optimal performance and longevity of the appliance.

6;2 Maintaining the Self-Basting Lid

After each use, clean the self-basting lid with mild soap and warm water. Avoid using abrasive cleaners or scrubbers, as they may damage the finish. Dry thoroughly to prevent rust. For tough food residue, soak the lid before cleaning. Regular maintenance ensures the lid continues to function effectively, providing even basting for moist and flavorful results. Proper care extends the lifespan of this essential feature.

6.3 Storage and Maintenance Tips

After cleaning, allow the roaster oven to cool completely before storing. Use a soft, dry cloth to wipe away moisture and prevent water spots. Store the oven in a dry, cool place, away from direct sunlight. Consider using a protective cover to keep dust off. Regularly check for any food residue and clean as needed. Proper storage and maintenance ensure long-term performance and reliability of the appliance.

Troubleshooting Common Issues

Address common issues like uneven cooking or electrical malfunctions by checking connections and ensuring proper preheating. Refer to the manual for solutions or contact customer support if problems persist.

7.1 Common Problems and Solutions

Common issues with the Oster 22 Quart Roaster Oven include uneven cooking, electrical malfunctions, and lid functionality. For uneven cooking, ensure even food distribution and proper preheating. If the oven doesn’t turn on, check the power cord and outlet. For lid issues, clean the self-basting mechanism regularly. Refer to the manual or contact customer support for persistent problems to ensure optimal performance and safety.

7.2 Resetting the Appliance

To reset the Oster 22 Quart Roaster Oven, turn the temperature control to the OFF position and unplug the unit from the power source. Wait for 10-15 minutes to allow the appliance to cool and reset internally. Plug it back in and resume operation. If issues persist, consult the user manual or contact customer support for further assistance.

7.3 When to Contact Customer Support

If your Oster 22 Quart Roaster Oven is damaged, has a faulty cord, or malfunctions after resetting, contact customer support. This also applies if you encounter issues not resolved by troubleshooting steps. Reach out for unclear instructions or operational doubts. Always follow safety guidelines to prevent accidents and ensure optimal performance. Professional assistance is recommended to avoid further complications and maintain warranty validity.

Manuals

waring pro waffle maker instruction manual

The Waring Pro Waffle Maker is a professional-grade appliance designed for making delicious Belgian waffles at home. It features a browning control dial and indicator lights for easy operation.

With its nonstick coating and durable construction, this waffle maker ensures perfectly cooked waffles every time, ideal for both home cooks and professionals seeking high-quality results effortlessly.

1.1 Overview of the Waring Pro Waffle Maker WMK300A

The Waring Pro WMK300A is a high-performance Belgian waffle maker designed for home and professional use. It features a stainless steel housing, nonstick plates, and a browning control dial for customizable results. The appliance includes indicator lights for preheating and cooking status, ensuring perfectly cooked waffles every time. Its compact design and durable construction make it ideal for frequent use, while the easy-clean surface simplifies maintenance. This model is a versatile addition to any kitchen, offering consistent performance for waffle enthusiasts.

1.2 Key Features of the Waring Pro Professional Belgian Waffle Maker

The Waring Pro Professional Belgian Waffle Maker boasts a range of innovative features, including a browning control dial for adjustable crispiness and indicator lights for monitoring preheating and cooking status. The appliance is equipped with a lockdown lid, folding handle, and drip tray for mess-free cooking. Its nonstick plates ensure effortless waffle release and easy cleaning. Designed for convenience and durability, this waffle maker offers consistent results, making it a reliable choice for both home and professional use.

Safety Precautions and First-Time Setup

Ensure safety by avoiding hot surfaces and keeping children away. Before first use, wipe plates with a damp cloth to remove dust. Expect a slight odor and smoking during initial heating, which is normal. Always unplug the waffle maker after use and before cleaning for added safety.

2.1 Important Safety Information

Always prioritize safety when using the Waring Pro Waffle Maker. Avoid touching hot surfaces, and keep children away during operation. Never submerge the appliance in water or use abrasive cleaners, as this can damage the nonstick coating. Ensure the waffle maker is placed on a heat-resistant surface and unplugged when not in use. Avoid using metal utensils, as they may scratch the plates. Follow all instructions carefully to prevent accidents and ensure optimal performance.

Before first use, wipe the plates with a damp cloth to remove any dust or packaging residue. Expect a slight odor and light smoking during the initial heating cycle, which is normal for new appliances. Proper setup and adherence to safety guidelines will ensure a safe and enjoyable cooking experience with your Waring Pro Waffle Maker.

2.2 Preparing the Waffle Maker for First Use

Before using your Waring Pro Waffle Maker, remove any packaging materials and protective covers. Wipe the plates with a damp cloth to eliminate dust or residue from shipping. Ensure all surfaces are clean and dry before proceeding. Plug in the appliance and allow it to preheat for a few minutes to prepare for its first use.

Expect a slight odor or light smoking during the initial heating cycle, which is normal for new appliances. Once preheated, your waffle maker is ready for its first batch of batter, ensuring a smooth and even cooking experience right from the start.

Components and Controls of the Waring Pro Waffle Maker

The Waring Pro Waffle Maker features a browning control dial, indicator lights, a lockdown lid, folding handle, and drip tray for efficient and mess-free cooking.

3.1 Understanding the Browning Control Dial

The browning control dial on the Waring Pro Waffle Maker allows precise adjustment of waffle color, from light to dark. This feature ensures customization to suit any preference.

By rotating the dial, users can achieve the perfect crispiness. The dial works in conjunction with the indicator lights to signal when the desired temperature is reached for consistent results every time.

3.2 Indicator Lights and Their Functions

The Waring Pro Waffle Maker features indicator lights that guide users through the cooking process. The green light illuminates when the appliance is preheated and ready for batter.

Additionally, the waffle maker beeps three times to signal that the waffle is fully cooked. These indicators ensure precise timing and perfect results, making the cooking experience intuitive and hassle-free for users of all skill levels.

3.3 Lockdown Lid, Folding Handle, and Drip Tray

The lockdown lid ensures even cooking by securely closing the waffle maker, while the folding handle provides convenient storage and portability. The drip tray catches excess batter, simplifying cleanup and preventing messes.

These features enhance usability, making the Waring Pro Waffle Maker practical for home and professional use. The lockdown lid guarantees consistent results, the folding handle saves space, and the drip tray keeps your kitchen tidy during cooking sessions.

Preparing and Using the Waffle Maker

Preheat the waffle maker, pour batter, and monitor cooking with indicator lights. Adjust the browning dial for desired crispiness and ensure even results every time.

4.1 Preheating the Waffle Maker

To preheat the Waring Pro Waffle Maker, plug it in and switch the toggle to the ON position. Allow it to heat for 5-7 minutes until the indicator light confirms it’s ready. A slight odor or smoke during the first use is normal. Use the browning control dial to set your desired temperature. Ensure the green indicator light illuminates, signaling the waffle maker is preheated and ready for batter. Always preheat before cooking for optimal results.

4.2 Cooking Process: Pouring Batter and Monitoring

Pour the recommended amount of batter onto the center of the preheated waffle maker. Use the browning control dial to adjust cooking preference. Avoid opening the lid during cooking to ensure even results. Once the waffle is cooked, the indicator light will signal doneness, and the maker will beep. Carefully remove the waffle with a heat-proof spatula, as metal may damage the nonstick surface. Repeat until all batter is used, adjusting settings as needed for consistent results.

Cleaning and Maintenance

Regularly clean the waffle maker after use to maintain performance. Wipe plates with a damp cloth and avoid abrasive cleaners. Dry thoroughly after cleaning to prevent rust. Store properly when not in use to ensure longevity and optimal functioning.

5.1 Routine Cleaning of the Waffle Maker

For routine cleaning, unplug the waffle maker and allow it to cool. Wipe the plates and exterior with a damp cloth, avoiding harsh chemicals or abrasive cleaners. Use a soft sponge or cloth to remove any batter residue. The nonstick coating requires gentle care to maintain its quality. For tougher stains, mix baking soda and water to create a paste, apply it, and let it sit before wiping clean. Regular cleaning prevents food buildup and ensures optimal performance.

5.2 Deep Cleaning and Troubleshooting

For deep cleaning, mix equal parts water and white vinegar in the waffle maker and heat it for 5 minutes. Wipe down the plates with a non-abrasive sponge. If the nonstick coating is damaged, avoid using metal utensils and contact customer support. Troubleshooting common issues like uneven cooking or sticking involves checking batter consistency and ensuring proper preheating. Regular deep cleaning prevents buildup and extends the appliance’s lifespan, ensuring consistent waffle quality and maintaining its professional performance.

Troubleshooting Common Issues

Address common issues like sticking or uneven cooking by ensuring proper preheating and batter consistency. For persistent problems, consult the manual or contact customer support for assistance.

6.1 Addressing Smoking or Odor During First Use

During the first use, the Waring Pro Waffle Maker may emit a slight odor or smoke, which is normal for new appliances. This occurs due to the heating elements and nonstick coating curing. Ensure the waffle maker is clean and free from packaging residue before use. Wipe the plates with a damp cloth to remove any dust or shipping materials. The odor should dissipate after a few uses.

If the smell persists, check for any leftover residue and clean the plates thoroughly. Proper preheating and maintenance can prevent such issues in the future. Always follow the manual’s cleaning guidelines to maintain optimal performance and reduce unwanted odors.

6.2 Resolving Nonstick Coating Damage

If the nonstick coating on your Waring Pro Waffle Maker is damaged, avoid using metal utensils, as they can scratch the surface. Instead, use heat-resistant plastic spatulas to prevent further damage. For stuck-on batter, gently clean with a soft cloth and mild detergent. Avoid abrasive cleaners or bleach, as they can harm the coating. Regular maintenance and proper cleaning can extend the life of the nonstick surface and ensure optimal waffle-making performance.

For minor scratches, continue using the waffle maker with caution. If the damage is severe, contact Waring customer service for repair or replacement options under warranty. Proper care and handling will help maintain the nonstick coating and ensure delicious, evenly cooked waffles every time.

Additional Tips and Recipes

Experiment with recipes like fluffy buttermilk waffles or sweet chocolate versions. Ensure batter is room temperature for even cooking. Avoid overmixing for a lighter texture.

7.1 Tips for Making Perfect Waffles

For perfect waffles, preheat the Waring Pro Waffle Maker to the desired temperature. Use room-temperature batter and avoid overmixing to ensure a light, fluffy texture. Pour 1-2 cups of batter, depending on the size, and cook until the indicator light signals completion. Don’t open the lid too early to prevent breaking the waffle. Let it cool slightly before serving for a crisper exterior. Experiment with add-ins like fresh fruit or nuts for extra flavor and texture.

  • Use the browning control dial to customize crispiness.
  • Don’t overcrowd the batter for even cooking.

7.2 Recommended Batter Recipes

Start with a classic waffle batter: 2 cups flour, 4 teaspoons baking powder, 1 teaspoon salt, 1/4 cup sugar, 2 large eggs, 1 cup milk, and 4 tablespoons melted butter. For a lighter texture, fold in beaten egg whites. Let the batter rest for 30 minutes to allow leavening. For added flavor, try adding vanilla extract or chocolate chips. Ensure ingredients are room temperature for optimal results; Experiment with gluten-free flours or plant-based milk for dietary preferences.

  • Classic buttermilk batter for tangy flavor.
  • Oatmeal batter for a hearty, wholesome twist.

Warranty and Customer Support

The Waring Pro Waffle Maker comes with a limited warranty covering manufacturing defects. For inquiries or support, contact Waring’s customer service team via phone or their official website.

8.1 Warranty Information for the Waring Pro Waffle Maker

The Waring Pro Waffle Maker is backed by a limited warranty that covers manufacturing defects for a specified period. This warranty ensures repairs or replacements at the manufacturer’s discretion. It applies to defects in materials and workmanship under normal use. Misuse, unauthorized modifications, or damage from improper cleaning are not covered. For detailed terms and conditions, refer to the user manual or visit Waring’s official website for comprehensive warranty information.

8.2 Contacting Waring Customer Service

For any inquiries, troubleshooting, or warranty-related issues, customers can contact Waring’s customer service team. Reach them via phone at their toll-free number or through email for assistance. Visit the official Waring website for contact details, support resources, and FAQs. Representatives are available during business hours to address concerns, provide repair information, or help with product-related questions. Ensure to have your product model and serial number ready for efficient support.

Downloading the Instruction Manual

Download the Waring Pro Waffle Maker manual from the official website. Use the model number (e.g., WMK300) to find and download the PDF instruction guide easily.

9.1 Where to Find the Waring Pro WMK300A User Manual

The Waring Pro WMK300A user manual can be downloaded directly from the official Waring website. Visit the support section, enter the model number, and access the PDF guide. Additionally, platforms like ManualsLib and ManualsBase offer free downloads of the WMK300A manual. Ensure to use the correct model number for accurate results. This manual provides detailed instructions, safety tips, and troubleshooting advice for optimal use of your waffle maker.

9.2 Additional Resources and Guides

Beyond the user manual, Waring offers additional resources to enhance your experience with the Pro WMK300A. Visit the Waring Commercial website for spec sheets, instructional guides, and troubleshooting tips. Platforms like ManualsLib and ManualsBase provide free access to PDF manuals and related documents. For recipes and advanced techniques, explore Waring’s official blog or authorized retailers’ websites. These resources ensure you maximize the potential of your waffle maker and maintain it in prime condition for years to come.

10.1 Final Tips for Optimal Use

For the best results, always preheat the waffle maker fully before adding batter. Use the browning control dial to customize your waffles’ crispiness. Avoid overfilling the plates, as this can lead to messy cleanup. Regularly clean the nonstick surface to maintain its performance. Store the waffle maker in a dry place after cleaning to prevent rust. Experiment with different recipes to explore various flavors and textures. Happy cooking!

10.2 Enjoying Your Waring Pro Waffle Maker

With your Waring Pro Waffle Maker, you can create delicious, professional-style waffles effortlessly. Experiment with different batter recipes to explore a variety of flavors, from classic buttermilk to chocolate or savory options. For fluffier waffles, fold in beaten egg whites gently. Always store the waffle maker clean and dry to ensure longevity. Enjoy the convenience of its nonstick surface and adjustable browning control, making every breakfast or brunch a delightful experience for family and friends.

Manuals

topsung walkie talkie manual

Welcome to the Topsung Walkie Talkie Manual! This guide provides comprehensive instructions for using your device, covering features, setup, and troubleshooting. Learn to maximize your walkie talkie’s potential with detailed step-by-step instructions for optimal performance and functionality.

1.1 Overview of the Topsung Walkie Talkie

The Topsung Walkie Talkie is a versatile, portable communication device designed for both personal and professional use. It features multiple channels, privacy codes, and NOAA Weather Alert for emergencies. With long battery life and rechargeability, it offers reliable performance. Its compact design, durable build, and user-friendly interface make it ideal for outdoor activities, events, and everyday communication needs. Perfect for staying connected on the go.

1.2 Importance of Reading the Manual

Reading the Topsung Walkie Talkie manual is essential for understanding its features, proper setup, and troubleshooting. It ensures you maximize the device’s capabilities, such as channel selection, privacy codes, and NOAA Weather Radio. The manual provides step-by-step guidance for optimal performance and resolves common issues. Familiarizing yourself with the manual prevents misuse and enhances your overall communication experience. Take time to review it thoroughly before use.

Key Features of the Topsung Walkie Talkie

The Topsung Walkie Talkie offers multiple channels, NOAA Weather Alert Radio, and long battery life with rechargeable options, ensuring reliable communication in various environments and conditions.

2.1 Multiple Channels and Privacy Codes

The Topsung Walkie Talkie features 22 channels and 121 privacy codes, including both CTCSS and DCS, ensuring secure and interference-free communication. Users can select from a wide range of options to customize their experience. This feature allows for private conversations and reduces unwanted interference, making it ideal for group or professional use. The combination of channels and codes provides flexibility and enhances communication clarity in various settings.

2.2 NOAA Weather Alert Radio

The Topsung Walkie Talkie is equipped with a NOAA Weather Alert Radio, enabling users to receive real-time emergency alerts and weather updates. This feature is crucial for outdoor activities, ensuring you stay informed during severe weather conditions. The device automatically scans NOAA channels, providing vital information to keep you safe. This reliable system is perfect for camping, hiking, or any situation where weather updates are essential for safety and planning.

2.3 Long Battery Life and Rechargeability

The Topsung Walkie Talkie offers an impressive long battery life, providing extended usage on a single charge. Its rechargeable design ensures convenience and cost-effectiveness. The device supports easy charging via USB or a docking station, making it ideal for both indoor and outdoor use. With efficient power management, you can enjoy reliable communication throughout the day without frequent recharging, enhancing your experience in various environments and activities.

Getting Started with Your Walkie Talkie

Start by unboxing and familiarizing yourself with the walkie talkie’s components. Install batteries, power it on, and complete the initial setup to begin using your device effectively.

3.1 Unboxing and Package Contents

Upon unboxing, you’ll find the walkie talkie handset, antenna, rechargeable batteries, charger, belt clip, wrist strap, and user manual. Ensure all items are included for proper setup. The package may also contain additional accessories like earpieces or holsters, depending on the model. Verify the contents before proceeding to ensure you have everything needed to start using your device effectively.

3.2 Installing Batteries

To install batteries, first remove the belt clip by pulling the tab and sliding it up. Next, pull the battery door lock tab up to release the compartment. Insert the rechargeable batteries according to the polarity indicators. Close the battery door securely. Finally, press and hold the Menu/Power button to turn on your walkie talkie. Ensure the batteries are properly seated for optimal performance.

3.3 Initial Setup and Powering On

Press and hold the Menu/Power button to turn on your walkie talkie. Once powered on, use the Up or Down button to select your desired channel. Ensure the batteries are properly installed before powering on. The device will automatically initialize and be ready for use. Proper installation ensures optimal functionality and communication clarity during operation.

Basic Operations

Master essential functions like turning the device on/off, adjusting volume, selecting channels, and using the PTT button. Utilize the Menu button for settings and NOAA features.

4.1 Turning the Device On/Off

To turn the Topsung Walkie Talkie on, press and hold the Menu/Power button until the LCD display lights up. The device is now ready for use. To turn it off, press and hold the same button until the screen turns off. Ensure the battery is installed correctly before powering on. This simple process guarantees efficient operation and preserves battery life when not in use.

4.2 Adjusting the Volume

Adjust the volume using the Volume Knob located on the top of the device. Rotate the knob clockwise to increase the volume and counterclockwise to decrease it. The Volume Knob ensures clear audio reception, allowing you to set the desired sound level for optimal communication. This feature enhances user experience by providing precise control over audio output, making it suitable for various environments and preferences.

4.3 Selecting Channels

Press the Menu/Power button to turn on the radio. Use the Up or Down buttons to navigate through the 22 available channels. Once selected, press the Menu button to confirm. This process allows seamless channel selection, ensuring efficient communication. Privacy codes (CTCSS/DCS) can also be set to minimize interference, providing a clear connection with your group or team.

4.4 Using the Push-to-Talk (PTT) Button

Press and hold the PTT button to initiate voice transmission. Ensure the device is on and the correct channel is selected. Speak clearly into the microphone while holding the button. Release the PTT to switch to receive mode. This feature ensures efficient one-way communication, allowing others to respond after your message. Keep the microphone uncovered for optimal audio quality during transmission.

Advanced Features

Unlock your Topsung Walkie Talkie’s full potential with advanced features. Explore privacy codes, NOAA Weather Radio, scanning, and power mode settings for enhanced communication efficiency.

5.1 Using Privacy Codes (CTCSS and DCS)

Enhance your communication privacy with CTCSS (Continuous Tone-Coded Squelch System) and DCS (Digital Code Squelch) codes. These codes help minimize interference and ensure only authorized users receive your messages. To use them, navigate to the menu, select the desired code type, and choose from the available options. This feature is ideal for secure conversations in busy environments, ensuring clear and uninterrupted communication.

5.2 Scanning and Monitoring Channels

Scanning allows you to automatically search for active channels with transmissions. Press the NOAA/Scan button to start scanning. The device will cycle through channels, stopping when it detects activity. This feature is useful for monitoring multiple channels simultaneously. To exit scan mode, press the NOAA/Scan button again. This function ensures you stay informed and connected in dynamic communication environments.

5.3 Setting Up the NOAA Weather Radio

Press the NOAA/Scan button to activate the NOAA Weather Radio feature. This allows you to receive emergency alerts and weather updates from NOAA. Ensure the device is set to the correct weather frequency for your area. Enable weather alerts in the menu to stay informed during severe conditions. This feature is crucial for outdoor activities, providing real-time updates to keep you safe and prepared for any situation.

5.4 Switching Between High and Low Power Modes

To switch between high and low power modes, press and hold the Menu/Power button until the menu appears. Use the Up or Down arrow buttons to navigate to the Power Mode setting. Select either High Power for extended range or Low Power to conserve battery life. Confirm your selection and exit the menu. This feature helps optimize performance based on your communication needs while managing battery usage efficiently.

Troubleshooting Common Issues

Address common problems like no power, poor reception, or button malfunctions by referring to this section. Find solutions for troubleshooting and resolving issues efficiently.

6.1 No Power or Battery Issues

If your walkie talkie has no power, ensure batteries are installed correctly. Check for corrosion or damage. Try resetting by removing the battery and pressing the power button. If issues persist, contact support or replace the batteries. Refer to the troubleshooting guide for detailed steps to resolve power-related problems effectively and restore functionality.

6.2 Poor Reception or No Signal

Experiencing poor reception or no signal? Ensure antennas are fully extended and free from damage. Move to an open area to avoid physical obstructions. Check that both devices are on the same channel and privacy code. Reset the walkie talkie by removing the battery and pressing the power button. If issues persist, refer to the troubleshooting guide for further assistance.

6.3 Button Malfunction

If buttons on your Topsung Walkie Talkie are not functioning, ensure no obstructions block their operation. Clean the buttons with a soft cloth to remove dirt or debris. If issues persist, reset the device by removing the battery and pressing the power button for 10 seconds. This often resolves button-related malfunctions. If problems continue, refer to the troubleshooting section for further guidance.

6.4 Resetting the Walkie Talkie

To reset your Topsung Walkie Talkie, remove the battery and press the power button for 10 seconds to discharge any residual power. Reinsert the battery and turn the device on. This process restores default settings, resolving software-related issues. Note that resetting will erase custom settings, so reconfigure channels and privacy codes afterward for proper functionality. This step ensures a fresh start for troubleshooting persistent problems.

Maintenance and Care

Regularly clean your Topsung Walkie Talkie with a soft cloth and avoid harsh chemicals. Store it in a dry, cool place to prevent damage. Updating firmware ensures optimal performance and security.

7.1 Cleaning the Walkie Talkie

Regularly clean your Topsung Walkie Talkie using a soft, dry cloth to remove dirt and dust. Avoid harsh chemicals or liquids, as they may damage the device. For stubborn stains, lightly dampen the cloth but ensure no moisture enters the device. Clean the antenna and external surfaces gently to maintain optimal performance and prevent signal interference. Avoid submerging the device in water or exposing it to extreme temperatures.

7.2 Storing the Device Properly

Store your Topsung Walkie Talkie in a cool, dry place away from direct sunlight and moisture. Use the original packaging or a protective case to prevent scratches. Avoid extreme temperatures or humidity, as this may damage the internal components. Remove batteries before long-term storage to prevent leakage. Ensure the device is fully powered off and clean before storing to maintain its performance and longevity.

7.3 Updating Firmware (if applicable)

To update your Topsung Walkie Talkie’s firmware, visit the ManualsLib website and download the latest version specific to your model. Install any required software from the manufacturer’s site. Connect your device to a computer using a compatible USB cable, ensuring it’s fully charged. Launch the firmware update tool, follow on-screen instructions to select and install the update. Avoid interrupting the process. After completion, reset your device if recommended. Consult the manual or contact support for any issues.

Accessories and Compatible Products

Explore a range of accessories for your Topsung Walkie Talkie, including chargers, earpieces, belt clips, and holsters designed to enhance functionality and portability.

8.1 Chargers and Charging Docks

Your Topsung Walkie Talkie comes with a range of charging options, including wall chargers, car chargers, and USB charging cables. For convenience, consider using a charging dock that can charge multiple devices at once. Always use original or compatible chargers to ensure safety and optimal performance. Keep extra chargers handy for emergencies or extended outdoor use. Dual-unit docks are ideal for charging both walkie talkies simultaneously, saving time and space.

8.2 Earpieces and Microphone Accessories

Enhance your Topsung Walkie Talkie experience with a variety of earpieces and microphone accessories. Choose from single-pin, 2-pin, or acoustic tube earpieces for discreet communication. Boom microphones and headsets are ideal for noisy environments, ensuring clear audio. Many accessories are compatible with popular Topsung models like the M880 and T628. These add-ons improve comfort and functionality, making them essential for professional or outdoor use. Optional in-line PTT buttons allow for easy, hands-free communication on the go.

8.3 Belt Clips and Holsters

Belt clips and holsters are essential accessories for carrying your Topsung Walkie Talkie. Made from durable materials like plastic or metal, they provide secure and convenient storage. Many models, such as the M880 and T628, come with detachable belt clips that can be easily installed or removed. For added protection, consider using a holster with a swivel feature for easy access. These accessories are designed to keep your device within reach while ensuring durability and ease of use during outdoor or professional activities.

Manuals

manual transmission shifter bushing

The manual transmission shifter bushing is a small but crucial component ensuring smooth gear shifts․ Its wear can lead to sloppy shifting and mechanical issues, necessitating regular maintenance․

1․1 Overview of Manual Transmission Components

A manual transmission system comprises several essential parts, including gears, bearings, the clutch, and linkages․ The shifter bushing is a critical component, ensuring smooth gear transitions by stabilizing the shifter mechanism․ Proper functioning of these components is vital for efficient power transfer from the engine to the wheels, enabling precise control over speed and torque during driving․

1․2 Importance of the Shifter Bushing in Manual Transmissions

The shifter bushing plays a pivotal role in maintaining precise gear alignment and smooth shifting․ It absorbs vibrations and minimizes wear on other components; A worn bushing can cause imprecise shifts, leading to mechanical stress and potential failures․ Regular inspection and timely replacement are essential to ensure optimal transmission performance and driver control, preventing costly repairs and enhancing overall driving experience․

What is a Manual Transmission Shifter Bushing?

A manual transmission shifter bushing is a component located in the shifter mechanism, playing a key role in gear alignment and smooth shifting․ It ensures precise control during gear changes by providing a stable connection point․

2․1 Function and Purpose of the Shifter Bushing

The shifter bushing serves as a critical connector between the gear shifter and the transmission linkage․ Its primary function is to provide a smooth, precise connection, allowing drivers to engage gears effortlessly․ By absorbing minor misalignments and vibrations, it ensures consistent shifting performance and prevents mechanical wear, enhancing overall driving efficiency and control․

2․2 Materials and Construction of Shifter Bushings

Shifter bushings are typically made from durable materials like polyurethane, rubber, or nylon, chosen for their resilience and ability to absorb vibrations․ Some bushings feature metal inserts for added strength․ The construction is designed to provide a snug fit within the shifter mechanism, ensuring precise movement and durability․ High-quality bushings often include grooves or textures to enhance alignment and reduce lateral movement, optimizing performance․

Symptoms of a Worn-Out Shifter Bushing

A worn-out shifter bushing often causes loose or sloppy gear shifts, grinding noises, and difficulty engaging gears, leading to an overall rough driving experience․

3․1 Common Issues Caused by a Failing Shifter Bushing

A failing shifter bushing can cause loose or sloppy gear shifts, grinding noises during gear changes, and difficulty engaging gears․ Drivers may also experience vibrations or uneven transmission performance․ Over time, this can lead to accelerated wear on other transmission components, potentially causing more severe mechanical issues if left unaddressed․ These symptoms often result in a less responsive and less controlled driving experience․

3․2 How to Diagnose Shifter Bushing Wear

Diagnosing a worn shifter bushing involves inspecting for visible wear, such as cracks or excessive movement․ Test driving the vehicle can reveal sluggish or uneven shifting․ Additionally, listening for unusual noises during gear changes and checking for play in the shifter linkage are effective methods․ A professional mechanic may also use specialized tools to assess the bushing’s condition accurately and recommend necessary repairs․ Regular inspection is key to early detection․

Replacement Guide for Manual Transmission Shifter Bushing

A step-by-step guide outlining the process to replace a worn shifter bushing, ensuring proper tools and techniques are used for a secure and efficient installation․

4․1 Step-by-Step Replacement Process

Start by removing the old bushing, ensuring the transmission is secure․ Clean the area thoroughly․ Align the new bushing with the shifter mechanism and press it into place firmly․ Use a hammer or specialized tool if needed․ Reassemble all components, ensuring proper alignment․ Test the shifter for smooth operation and verify there are no loose parts․ Double-check for any signs of wear or misalignment․

4․2 Tools and Materials Required for Replacement

To replace the shifter bushing, you’ll need basic tools like pliers, screwdrivers, and wrenches․ A bushing removal tool or slide hammer may be necessary for extraction․ Ensure you have the new bushing, a small amount of grease, and a C-clamp for secure installation․ Additional materials like a punch or drift can aid in alignment․ Gather all tools beforehand to streamline the process and avoid delays․

Locating and Inspecting the Shifter Bushing

Locate the shifter bushing underneath the vehicle, near the gearshift and connected to the transmission․ Inspect for wear, cracks, or looseness, ensuring proper function and alignment․

5․1 Identifying the Shifter Bushing in Your Vehicle

The shifter bushing is typically located near the gearshift assembly and connected to the transmission․ It appears as a small, rubber or polyurethane component, often seated in a metal sleeve․ To identify it, refer to your vehicle’s repair manual or consult a diagram․ Look for wear patterns or movement around the gearshift․ Proper identification ensures accurate inspection and prevents confusion with similar components nearby․

5․2 Visual Inspection and Assessment

Inspect the shifter bushing for cracks, excessive wear, or deformation․ Check for dirt or debris accumulation around the component, as this can indicate improper alignment or deterioration․ Look for signs of looseness or movement when shifting gears, which may signal wear․ If the bushing appears damaged or loose, replacement is necessary to maintain smooth transmission operation and prevent further damage;

Removing the Old Shifter Bushing

Use specialized tools to safely remove the old bushing, ensuring no damage to surrounding components․ Proper preparation and technique are essential for a successful extraction process․

6․1 Preparing the Vehicle for Bushing Removal

Before removing the shifter bushing, ensure the vehicle is on level ground and apply the parking brake․ Disconnect the battery to prevent accidental startups․ Drain transmission fluid if necessary․ Remove any components obstructing access, such as the center console or shift knob․ Consult a repair manual for specific instructions tailored to your vehicle’s make and model․ Wear protective gear and ensure good lighting for visibility․

6․2 Safe Removal Techniques to Avoid Damage

  • Use a punch or drift to gently pry the bushing from its housing, avoiding force that could damage nearby components․
  • Apply penetrating oil if the bushing is stuck, letting it sit to loosen corrosion․
  • Gently heat the area with a heat gun to expand metal, easing removal without damaging the bushing or transmission․
  • Avoid using hammers or chisels, as they may cause irreversible damage to the shifter or surrounding parts․
  • Work slowly and carefully to prevent scratching or bending sensitive components․

Installing the New Shifter Bushing

Align the new bushing with the housing, ensuring proper seating․ Gently tap it into place using a drift or punch, avoiding force that could misalign it․

7․1 Proper Alignment and Fitting Techniques

Proper alignment is critical when installing the new shifter bushing․ Ensure the bushing is seated evenly in its housing, using a drift or punch to guide it into place․ Avoid forcing it, as this could cause misalignment․ Use a rubber mallet to gently tap it in, ensuring it sits flush with the surrounding surface․ Double-check alignment with the gear lever to ensure smooth operation․

7․2 Securing the New Bushing in Place

Once the bushing is properly aligned, apply a small amount of threadlocker to the retaining screws․ Tighten them evenly in a star pattern to avoid misalignment․ Ensure the torque specifications are met without over-tightening, which could damage the housing․ Allow the threadlocker to set for a few minutes before testing the shifter to confirm smooth, precise movement, ensuring the bushing is securely fastened․

Testing the Transmission After Replacement

After installing the new bushing, test the transmission by shifting through all gears smoothly․ Ensure there are no grinding noises or hesitation, confirming proper function and alignment․

8․1 Ensuring Smooth Gear Shifting Post-Replacement

After replacing the shifter bushing, test the transmission by shifting through all gears․ Listen for smooth, quiet transitions․ Avoid abrupt movements․ Check for any signs of hesitation or grinding, which could indicate improper alignment or installation issues․ Ensure the clutch is fully disengaged before shifting to maintain smooth operation and prevent further wear on components․

8․2 Checking for Any Remaining Issues

After replacement, inspect the shifter mechanism for proper alignment and tightness․ Test all gears, listening for unusual noises or vibrations․ Ensure the shifter moves smoothly without play․ If issues persist, check the bushing installation or seek professional assistance to avoid further damage․ Addressing problems promptly ensures optimal performance and prevents premature wear on other transmission components․

Maintenance Tips to Extend Bushing Life

Regular inspection and lubrication of the shifter bushing can extend its lifespan․ Cleaning the area and ensuring proper alignment during installation prevent premature wear․ Avoiding aggressive shifting habits also helps maintain the bushing’s integrity and ensures smooth gear transitions․

9․1 Regular Inspection and Lubrication

Regular inspection of the shifter bushing every 6-12 months is essential to identify early signs of wear․ Lubricate the bushing with high-quality grease to reduce friction and prevent corrosion․ Clean the area thoroughly before applying lubricant to ensure optimal performance․ Inspect for cracks, excessive wear, or looseness, as these indicate the need for replacement․ Proper lubrication enhances shifting smoothness and extends the bushing’s lifespan․

9․2 Avoiding Practices That Accelerate Wear

Avoid aggressive or abrupt shifting, as it can stress the bushing․ Refrain from resting your hand on the gearshift while driving, as the constant pressure accelerates wear․ Use the correct gear for your speed to reduce strain․ Avoid excessive force when shifting into reverse or first gear․ Proper driving techniques, such as smooth acceleration and full clutch engagement, help extend the bushing’s lifespan and prevent premature wear․

Cost and Availability of Shifter Bushings

Shifter bushings are affordable, typically priced between $5 and $20, depending on quality and brand․ They are widely available at auto parts stores and online retailers․

10․1 Price Range for Replacement Bushings

Manual transmission shifter bushings are generally affordable, with replacement costs ranging from $5 to $20, depending on the vehicle’s make, model, and bushing quality․ High-performance or specialized bushings may cost slightly more, up to $30, but are still relatively inexpensive compared to other transmission components․ Prices vary by retailer, but online stores often offer competitive deals, making it easy to find a suitable replacement within budget․

10․2 Where to Purchase High-Quality Bushings

High-quality manual transmission shifter bushings can be purchased from reputable auto parts retailers, both online and in-store․ Popular options include Amazon, RockAuto, and Summit Racing, which offer competitive pricing and genuine products․ Specialty stores like Jegs and manufacturer-authorized dealers also provide reliable options․ Ensure to purchase from trusted sellers to guarantee authenticity and warranty coverage for your vehicle’s specific needs․

The manual transmission shifter bushing plays a vital role in smooth gear shifting․ Regular inspection and timely replacement ensure optimal performance and prevent mechanical issues․

11․1 Summary of Key Points

The manual transmission shifter bushing is a critical component ensuring smooth gear transitions․ Regular inspections and timely replacements are essential to maintain optimal performance․ Identifying symptoms like loose shifting or noise early can prevent major repairs․ Proper installation and alignment of the bushing are vital for functionality․ By following maintenance tips and avoiding harmful practices, drivers can extend the bushing’s lifespan and ensure reliable transmission operation․

11․2 Final Thoughts on Shifter Bushing Maintenance

The shifter bushing plays a vital role in smooth gear transitions, and its maintenance is essential for transmission health․ Regular inspections and proper lubrication can extend its lifespan․ Avoiding aggressive driving habits and addressing wear promptly prevents costly repairs․ Investing in high-quality bushings and ensuring correct installation are key to reliable performance․ Proper care ensures smooth, precise shifting and long-term transmission durability․

Manuals

honeywell vision pro 8000 user manual

The Honeywell VisionPro 8000 is a state-of-the-art‚ touchscreen programmable thermostat designed for precise temperature control and smart home integration‚ offering advanced features for energy efficiency and comfort.

1.1 Overview of the VisionPro 8000 Series

The VisionPro 8000 Series is a line of advanced‚ touchscreen programmable thermostats designed for precise temperature control. With a user-friendly interface and 7-day programming‚ it offers compatibility with various HVAC systems and integrates seamlessly with smart home devices. Its large‚ backlit display provides clear temperature and time readings. This series is ideal for residential use‚ combining energy efficiency with enhanced comfort and convenience.

1.2 Key Features and Benefits

The VisionPro 8000 offers a high-resolution‚ color touchscreen display‚ 7-day programmable scheduling‚ and compatibility with smart home systems via Honeywell RedLINK. It supports integration with whole-home humidifiers‚ dehumidifiers‚ and ventilators for enhanced comfort. The thermostat also features remote access through the Honeywell RedLINK Internet Gateway‚ allowing users to control settings via smartphone or tablet‚ optimizing energy usage and convenience.

Installation and Setup

The Honeywell VisionPro 8000 installation requires basic HVAC knowledge‚ with step-by-step instructions provided in the manual. Ensure compatibility with your system and follow guidelines for optimal setup.

2.1 Compatibility and Prerequisites

Ensure your HVAC system is compatible with the VisionPro 8000‚ supporting heating‚ cooling‚ and optional humidifier/dehumidifier systems. Verify electrical requirements and wiring connections. A C-wire is necessary for Wi-Fi functionality. Check that your system operates within the thermostat’s voltage range‚ typically 24V AC. Refer to the manual for specific compatibility charts and prerequisites before installation.

2.2 Step-by-Step Installation Guide

Start by turning off power to your HVAC system. Remove the old thermostat and label wires. Mount the VisionPro 8000 base plate‚ ensuring level alignment. Connect wires to corresponding terminals‚ referencing the manual. Reattach the faceplate and restore power. Follow on-screen prompts to complete setup‚ including Wi-Fi configuration and system testing. Refer to the manual for detailed diagrams and troubleshooting tips.

Programming the Thermostat

The Honeywell VisionPro 8000 allows easy scheduling with programmable modes‚ enabling users to set daily and weekly temperature preferences for optimal comfort and energy savings.

3.1 Understanding Programmable Modes

The VisionPro 8000 offers programmable modes‚ including manual and automatic options. Manual mode allows users to adjust temperature settings without a schedule‚ while automatic mode switches between heating and cooling based on programmed preferences. This flexibility ensures efficient temperature management‚ catering to different lifestyles and preferences for optimal comfort and energy efficiency year-round.

3.2 Setting Up Daily and Weekly Schedules

The VisionPro 8000 allows users to create customized daily and weekly schedules. Access the menu‚ select the schedule type‚ and set temperature points for different times. Program up to four periods per day‚ adjusting settings to match your routine. This feature ensures energy efficiency and consistent comfort‚ letting you predefine preferences for weekdays and weekends with ease.

Advanced Features

The Honeywell VisionPro 8000 offers advanced features like smart home integration‚ remote access via RedLINK‚ and multi-system control for humidifiers‚ dehumidifiers‚ and ventilators. Its large touchscreen display and menu-driven programming optimize energy usage and enhance comfort seamlessly.

4.1 Smart Home Integration

The Honeywell VisionPro 8000 seamlessly integrates with smart home systems‚ enabling voice control via Amazon Alexa or Google Assistant. Its compatibility with broader smart ecosystems allows for synchronized operation with other devices‚ enhancing home automation and energy efficiency. Remote access via the Honeywell RedLINK Internet Gateway ensures effortless temperature adjustments from smartphones or tablets‚ providing unparalleled convenience and control.

4.2 Remote Access via Honeywell RedLINK

The Honeywell VisionPro 8000 offers remote access through the Honeywell RedLINK Internet Gateway‚ allowing users to monitor and adjust their thermostat settings via the web‚ smartphone‚ or tablet. This feature provides convenience and flexibility‚ enabling real-time temperature adjustments and energy management from anywhere. It ensures seamless control over your home’s comfort‚ even when you’re not physically present.

Maintenance and Troubleshooting

Regular maintenance and troubleshooting tips ensure optimal performance‚ extend lifespan‚ and enhance efficiency of your Honeywell VisionPro 8000 thermostat‚ addressing common issues effectively.

5.1 Regular Maintenance Tips

To maintain your Honeywell VisionPro 8000 thermostat‚ clean the touchscreen regularly with a soft cloth and ensure proper ventilation around the device. Check and replace batteries annually if applicable. Update firmware periodically to access new features and improvements. Regular maintenance ensures consistent performance‚ optimal functionality‚ and extends the lifespan of your thermostat.

5.2 Common Issues and Solutions

Common issues with the Honeywell VisionPro 8000 include connectivity problems‚ display malfunctions‚ and temperature inaccuracies. Solutions involve restarting the thermostat‚ ensuring proper wiring‚ and cleaning the touchscreen. For connectivity‚ check RedLINK gateway status and Wi-Fi settings. If issues persist‚ refer to the user manual or contact Honeywell support for assistance. Regular updates and maintenance can prevent many of these problems.

User Interface and Navigation

The Honeywell VisionPro 8000 features an intuitive‚ user-friendly interface with a touchscreen display‚ offering easy navigation and clear menu options for seamless temperature control and programming.

6.1 Navigating the Touchscreen Display

The VisionPro 8000’s touchscreen display offers intuitive navigation with clear menus. Users can easily access settings‚ schedules‚ and system modes by tapping on-screen options. The large‚ backlit display ensures visibility even in low light‚ while menu-driven programming simplifies setup and adjustments‚ making it accessible for users of all technical levels to operate efficiently and effectively.

6.2 Customizing Display Settings

The VisionPro 8000 allows users to customize the touchscreen display to suit their preferences. Adjust brightness levels and backlight timing for optimal visibility. Select from various display options to show current temperature‚ setpoint‚ and time. These settings enhance user experience‚ ensuring the thermostat interface is both functional and visually appealing‚ tailored to individual needs and environmental conditions.

Energy Efficiency and Savings

The Honeywell VisionPro 8000 promotes energy efficiency through programmable modes and smart recovery‚ optimizing heating and cooling usage to reduce energy waste and lower utility bills.

7.1 Optimizing Energy Usage

The Honeywell VisionPro 8000 optimizes energy usage through programmable modes and smart recovery‚ allowing users to set precise temperature schedules. This reduces unnecessary heating or cooling when the home is unoccupied‚ thereby minimizing energy waste and lowering utility bills. The thermostat’s advanced features ensure efficient operation‚ contributing to overall energy savings and environmental benefits.

7.2 Monitoring Energy Consumption

The Honeywell VisionPro 8000 allows users to monitor energy consumption through detailed reports and real-time tracking. The thermostat provides insights into heating and cooling usage‚ helping identify trends and opportunities for savings. Remote monitoring via the Honeywell RedLINK app enables users to track energy use from anywhere‚ ensuring efficient management of their home’s climate control system.

Integration with Other Systems

The Honeywell VisionPro 8000 is designed for seamless integration with smart home systems and compatible HVAC equipment‚ enhancing functionality and ensuring optimal performance across connected devices.

8.1 Compatible Devices and Systems

The Honeywell VisionPro 8000 thermostat is compatible with a wide range of systems‚ including whole-home humidifiers‚ dehumidifiers‚ and ventilators. It also integrates seamlessly with smart home devices through the Honeywell RedLINK Internet Gateway‚ allowing remote control via smartphones and tablets. Additionally‚ it supports various HVAC systems and can be connected to other smart home hubs for enhanced functionality.

8.2 Configuring Integrated Features

Configuring integrated features on the Honeywell VisionPro 8000 involves navigating the touchscreen menu to enable and customize settings for connected devices. Users can easily set up controls for humidifiers‚ dehumidifiers‚ and ventilators‚ ensuring optimal comfort. The thermostat also supports smart home integration‚ allowing seamless connectivity with systems like the Honeywell RedLINK Internet Gateway for remote access and advanced functionality.

Security and Privacy

The Honeywell VisionPro 8000 ensures secure data transmission via encryption and a protected gateway. User data privacy is maintained with strict compliance to industry standards and regulations.

9.1 Securing Your Thermostat

Securing your Honeywell VisionPro 8000 involves setting a strong password‚ enabling two-factor authentication‚ and regularly updating firmware. Ensure the thermostat is connected to a secure network and avoid public Wi-Fi. Disable remote access when not in use to prevent unauthorized control and maintain your home’s privacy and security effectively at all times.

9.2 Data Privacy Considerations

Honeywell prioritizes data privacy by encrypting thermostat data during transmission and storage. User information is protected under strict compliance with regulations like GDPR and CCPA. Regular firmware updates enhance security‚ and users can opt-out of data sharing or delete their information through the Honeywell RedLINK platform‚ ensuring control over personal data usage and privacy settings.

Warranty and Support

Honeywell offers a limited warranty covering defects in materials and workmanship for the VisionPro 8000. Dedicated customer support is available through phone‚ email‚ and online resources.

10.1 Warranty Information

The Honeywell VisionPro 8000 thermostat is backed by a limited warranty covering defects in materials and workmanship. The warranty typically lasts for one year from the date of purchase‚ provided the product is installed and maintained according to the manufacturer’s instructions. Registration may be required to activate warranty benefits‚ ensuring protection against faulty components or labor costs for repairs.

10.2 Contacting Honeywell Support

For assistance with your VisionPro 8000 thermostat‚ Honeywell provides multiple support channels. Visit their official website to access online resources‚ including FAQs and user manuals. You can also contact their customer service team via phone or email‚ available Monday through Friday during business hours. Additionally‚ live chat support is offered for quick troubleshooting and product inquiries‚ ensuring prompt resolution for any issues you may encounter.

The Honeywell VisionPro 8000 thermostat offers a seamless blend of efficiency‚ comfort‚ and smart technology‚ making it an excellent choice for modern homes. Explore additional resources for further assistance.

11.1 Final Thoughts

The Honeywell VisionPro 8000 thermostat stands out as a top-tier choice‚ combining intuitive controls‚ energy efficiency‚ and smart integration. Its advanced features and user-friendly design make it ideal for modern homes seeking comfort and convenience. With its robust capabilities‚ it remains a reliable and forward-thinking solution for temperature management.

11.2 Additional Resources

For further assistance‚ Honeywell offers comprehensive resources‚ including the VisionPro 8000 user manual‚ installation guides‚ and troubleshooting tips. Visit Honeywell’s official website or contact their support team for detailed documentation and expert advice‚ ensuring optimal use of your thermostat’s features and functions.

Manuals

maryland stormwater design manual

The Maryland Stormwater Design Manual is the official guide for stormwater management principles‚ methods‚ and practices‚ published in 2000 and revised in 2009 to include BMPs and design criteria.

1.1 Purpose and Scope

The Maryland Stormwater Design Manual serves as the official guide for stormwater management‚ outlining principles‚ methods‚ and practices to ensure effective stormwater control. Published in 2000 and revised in 2009‚ the manual provides design criteria‚ BMPs‚ and maintenance requirements to protect water quality and reduce runoff impacts. Its scope covers urban and rural areas‚ addressing hydrology‚ hydraulics‚ and environmental considerations. The manual is designed to assist engineers‚ developers‚ and regulators in implementing sustainable stormwater solutions while complying with state and federal regulations. It emphasizes performance standards‚ equivalencies‚ and adaptive practices to meet Maryland’s unique environmental challenges and climate conditions.

1.2 Key Principles of Stormwater Management in Maryland

The key principles of stormwater management in Maryland emphasize protecting water quality‚ reducing runoff‚ and promoting sustainable development. The manual integrates Environmental Site Design (ESD) practices‚ which prioritize conservation of natural hydrologic processes. It advocates for Best Management Practices (BMPs) to minimize environmental impacts‚ ensuring compliance with state and federal regulations. Principles include maintaining natural hydrologic conditions‚ controlling sediment‚ and preventing erosion. The manual also stresses the importance of non-structural practices and green infrastructure to enhance water quality and reduce pollution. These principles guide engineers‚ developers‚ and planners in designing effective stormwater systems that balance human needs with environmental protection‚ fostering a sustainable approach to land development in Maryland.

History and Evolution of the Manual

The Maryland Stormwater Design Manual was first published in 2000 and revised in 2009 to incorporate Environmental Site Design practices‚ reflecting evolving stormwater management standards and regulations.

2.1 Publication and Revisions

The Maryland Stormwater Design Manual was originally published in 2000 and underwent significant revisions in May 2009. These updates aimed to enhance stormwater management practices and align with environmental regulations. The revised manual incorporated new guidelines for Best Management Practices (BMPs) and introduced updated design criteria. Subsequent supplements have been added to reflect advancements in stormwater management and address emerging environmental challenges. The manual serves as a comprehensive resource for engineers‚ developers‚ and local governments‚ ensuring effective stormwater management across Maryland.

2.2 Incorporation of Environmental Site Design (ESD) Practices

Environmental Site Design (ESD) practices were integrated into the Maryland Stormwater Design Manual to promote sustainable stormwater management. ESD emphasizes preserving natural hydrologic processes and minimizing environmental impacts. The manual incorporates ESD principles such as stream response‚ soil erosion control‚ and wetland plantings. These practices aim to reduce runoff‚ improve water quality‚ and enhance biodiversity. Updates to the manual reflect a shift toward holistic design approaches‚ encouraging developers to adopt ESD techniques alongside traditional BMPs. This integration ensures that stormwater management aligns with broader environmental goals‚ fostering healthier ecosystems and more resilient communities across Maryland.

Key Chapters and Content

The manual includes chapters on hydrology‚ hydraulics‚ BMPs‚ design criteria‚ and maintenance‚ providing comprehensive guidance for effective stormwater management in Maryland.

3.1 Hydrology and Hydraulics

The Maryland Stormwater Design Manual provides detailed hydrology and hydraulics principles to manage stormwater effectively. It includes runoff coefficient calculations‚ rainfall intensity-duration relationships‚ and stormwater sizing methods. The manual emphasizes understanding watershed characteristics‚ such as imperviousness and drainage areas‚ to accurately compute runoff rates and volumes; Hydraulic design principles guide the selection and sizing of stormwater management structures‚ ensuring they can handle peak flows and maintain water quality. The chapter also addresses the impact of environmental factors like soil types and land use on hydrologic processes. These principles are essential for designing systems that protect water resources and prevent flooding‚ aligning with Maryland’s environmental goals.

3.2 Best Management Practices (BMPs)

The Maryland Stormwater Design Manual outlines Best Management Practices (BMPs) to effectively manage stormwater runoff. BMPs include structural practices like wet ponds‚ bioretention‚ and green roofs‚ as well as non-structural measures such as site design and low-impact development techniques. These practices aim to reduce runoff volume‚ improve water quality‚ and enhance recharge. The manual provides detailed design criteria for BMPs‚ including sizing calculations‚ soil and vegetation requirements‚ and maintenance guidelines. BMPs are categorized into groups based on their primary function‚ such as water quality‚ channel protection‚ or flood control. Proper selection and implementation of BMPs ensure compliance with Maryland’s stormwater regulations and environmental goals. Regular maintenance is emphasized to ensure long-term effectiveness.

3.3 Design Criteria for Stormwater Management

The Maryland Stormwater Design Manual provides specific design criteria for stormwater management‚ ensuring effective implementation of BMPs and structural practices. Key criteria include performance standards for water quality‚ channel protection‚ and flood control. Design elements such as detention ponds‚ bioretention areas‚ and infiltration systems are detailed with sizing and configuration guidelines. Hydrologic and hydraulic analyses are required to ensure designs meet regulatory standards. The manual emphasizes the importance of soil type‚ vegetation‚ and maintenance access in BMP design. Design criteria also address environmental site design (ESD) principles‚ promoting sustainable practices. Regular updates to the manual reflect advances in stormwater management and climate change projections‚ ensuring adaptive and resilient designs. Compliance with these criteria is mandatory for all development projects in Maryland.

3.4 Maintenance Requirements and Inspection

The Maryland Stormwater Design Manual outlines rigorous maintenance requirements and inspection schedules to ensure the long-term functionality of stormwater management systems. Regular inspections are mandated to identify and address potential issues such as sediment accumulation‚ vegetation health‚ and structural integrity. Maintenance activities include cleaning‚ pruning‚ and repairing BMPs like detention ponds‚ bioretention areas‚ and infiltration systems. Property owners and managers are responsible for implementing these measures‚ with records kept for compliance verification. Annual inspections are typically required‚ with reports submitted to local authorities. Proper maintenance ensures water quality‚ flood protection‚ and ecosystem health‚ aligning with Maryland’s environmental goals and regulatory standards.

Technical Design Criteria

The Maryland Stormwater Design Manual provides technical criteria for stormwater management‚ including hydrology‚ BMPs‚ and design calculations‚ ensuring effective runoff control and water quality protection.

4.1 Runoff Coefficients and Calculations

The Maryland Stormwater Design Manual provides detailed methodologies for calculating runoff coefficients‚ which are essential for determining stormwater runoff rates and volumes. These coefficients are based on factors such as land use‚ soil type‚ and impervious surface percentages. The manual outlines step-by-step procedures for hydrologic and hydraulic calculations‚ ensuring accurate designs for stormwater management systems. It emphasizes the use of approved formulas and models to assess runoff characteristics‚ which are critical for sizing best management practices (BMPs) and ensuring compliance with water quality standards. Proper application of these calculations is vital for effective stormwater management and environmental protection in Maryland.

4.2 Stormwater Sizing and Design Storms

Stormwater sizing and design storms are critical components of the Maryland Stormwater Design Manual‚ ensuring systems can manage runoff effectively. The manual provides criteria for designing stormwater management facilities based on specific design storms‚ typically ranging from 10-year to 100-year events. These design storms are used to calculate peak flow rates and runoff volumes‚ which are essential for sizing ponds‚ channels‚ and other BMPs. The manual emphasizes the importance of hydrologic and hydraulic modeling to ensure systems can handle both water quantity and quality. Proper sizing ensures compliance with environmental standards‚ protecting water resources from pollution and erosion while maintaining ecological balance.

Implementation and Compliance

The manual outlines permit requirements‚ NOI applications‚ and compliance measures‚ ensuring adherence to state and local regulations for effective stormwater management and environmental protection.

5.1 Permit Requirements and NOI Application Process

Projects with a limit of disturbance (LOD) of one acre or more must obtain a permit under Maryland General Permit No. 20-CP for stormwater discharge. The Notice of Intent (NOI) application process requires submitting detailed project plans to the Highway Hydraulics Division liaison. The Maryland Department of the Environment (MDE) oversees compliance‚ ensuring adherence to stormwater management standards. Proper documentation‚ including BMP designs and runoff calculations‚ must accompany NOI submissions. This process ensures that construction activities meet state and federal environmental regulations‚ protecting water quality and reducing pollution from stormwater runoff. Compliance with these requirements is mandatory for all applicable projects in Maryland.

5.2 Local Ordinances and Adoption by Counties

Local jurisdictions in Maryland must adopt ordinances ensuring compliance with the Stormwater Design Manual. Counties like Prince George’s have implemented specific design requirements for land development‚ aligning with state guidelines. Local governments are responsible for enforcing these standards‚ often integrating them into zoning laws. The manual’s adoption varies by county‚ with some incorporating additional criteria to address regional environmental concerns. Compliance with local ordinances is essential for project approval‚ ensuring consistency with Maryland’s water quality and stormwater management goals. This decentralized approach allows counties to tailor regulations while maintaining alignment with state-level environmental objectives. Local adoption ensures effective implementation of stormwater management practices statewide. Counties must also ensure equivalency in their standards to the Maryland Design Manual.

Environmental Considerations

The manual emphasizes protecting water quality‚ wetlands‚ and natural habitats while addressing soil erosion and flood risks through sustainable stormwater practices and ecological preservation.

6.1 Wetland Plantings and Soil Erosion Control

Wetland plantings are crucial for water quality improvement and habitat restoration‚ as outlined in Sections 3.2.1 to 3.2.5 and Appendix A of the manual. These sections provide detailed guidance on selecting native vegetation and designing plantings to enhance stormwater treatment. Soil erosion control measures are emphasized to prevent sedimentation and maintain ecosystem balance. The manual recommends techniques such as revegetation‚ geotextiles‚ and slope stabilization to minimize erosion risks. Additionally‚ it highlights the importance of integrating these practices with broader environmental site design (ESD) principles to ensure sustainable stormwater management. Proper implementation of these measures helps protect aquatic habitats and maintains hydrologic functionality in developed areas.

6.2 Flood Protection and Water Quality Standards

Flood protection and water quality standards are central to the Maryland Stormwater Design Manual‚ ensuring communities are safeguarded from flooding while maintaining aquatic health. The manual emphasizes designing stormwater management systems to reduce runoff velocity and volume‚ protecting waterways from pollution. It outlines criteria for BMPs to meet water quality standards‚ focusing on sediment removal and nutrient reduction. Regular inspections and maintenance are stressed to ensure system effectiveness. The manual also integrates future climate change projections‚ adapting designs to handle increased stormwater runoff and protect both people and the environment. These standards aim to balance flood mitigation with ecological preservation‚ promoting sustainable water resource management.

Future Updates and Climate Change Projections

The Maryland Stormwater Design Manual will incorporate future updates to address climate change‚ including increased stormwater runoff projections‚ ensuring adaptive and resilient stormwater management practices.

7.1 Adaptation to Increased Stormwater Runoff

The Maryland Stormwater Design Manual is being updated to address projected increases in stormwater runoff due to climate change. Rising temperatures and altered precipitation patterns are expected to intensify runoff in urban and coastal areas. These changes necessitate adaptive design strategies to mitigate flooding and erosion risks. The manual will incorporate revised hydrologic models and design criteria to account for future runoff projections. Enhanced BMPs and green infrastructure solutions will be emphasized to improve water quality and reduce flood risks. Local governments are encouraged to adopt these updates to ensure resilient stormwater management systems. Public outreach and stakeholder engagement will support implementation.

Manuals

chevrolet 4 speed manual transmission

The Chevrolet 4-speed manual transmission is a durable and popular gearbox known for its strength and versatility in both trucks and performance-oriented cars․

Overview of the Chevrolet 4-Speed Manual Transmission

The Chevrolet 4-speed manual transmission, notably the SM465, is a heavy-duty gearbox produced from 1968 to 1991․ Designed for light and medium-duty trucks, it features a top-loading design with a cast-iron case for added strength․ The SM465 is fully synchronized, offering a standard H shift pattern with reverse located to the passenger side and downwards․ Known for its durability and versatility, this transmission was widely used in Chevrolet trucks, SUVs, and performance-oriented cars like the Corvette and Camaro․ Its strength, low maintenance, and wide availability make it a popular choice among enthusiasts and restorers․

History and Evolution of the Chevrolet 4-Speed Manual Transmission

The Chevrolet 4-speed manual transmission evolved over decades, with the Muncie 4-speed being a landmark․ Introduced in the mid-20th century, it became iconic in GM trucks and performance cars․

Early Developments and Implementation in Chevrolet Vehicles

The Chevrolet 4-speed manual transmission first appeared in the 1960s, with the SM465 being introduced in 1968 for trucks and SUVs; Known for its durability, it featured a cast-iron case and a granny low gear, making it ideal for heavy-duty applications․ The Muncie 4-speed, including the M20, M21, and M22 variants, became synonymous with performance, equipping iconic models like the Corvette and Camaro․ These transmissions were engineered to deliver precise control and robust performance, solidifying their reputation in Chevrolet’s lineup․

The Role of the Muncie 4-Speed Transmission in Chevrolet’s History

The Muncie 4-speed transmission played a pivotal role in Chevrolet’s history, becoming iconic for its durability and performance․ Produced in Muncie, Indiana, it was designed to replace the earlier SM420, offering enhanced synchronization and versatility․ The M20, M21, and M22 variants catered to different needs, from everyday driving to high-performance racing․ Its widespread use in models like the Corvette and Camaro cemented its legacy, making it a sought-after component in classic Chevrolet restorations and a symbol of the golden era of manual transmissions in American automotive history․

Technical Specifications and Features

The Chevrolet 4-speed manual transmission, like the SM465, features a heavy-duty design with a top-loading, cast-iron case and fully synchronized gears for smooth shifting․

Key Components and Design of the Chevrolet 4-Speed Manual Transmission

The Chevrolet 4-speed manual transmission features a robust design with a cast-iron case, top-loading mechanism, and fully synchronized gears for smooth operation․ The SM465 model, for instance, includes a 12-inch case with extra ribbing for added strength, making it suitable for heavy-duty applications․ Its gearsets are designed to handle high torque, ensuring reliability in both on-road and off-road conditions․ The transmission also incorporates a standard H shift pattern with reverse gear located to the passenger side and downward, enhancing driver ease․

Key components include a durable gear cluster, synchromesh rings, and a sturdy input shaft․ The Muncie variants, such as the M20, M21, and M22, offer varying gear ratios to cater to different performance needs․ These transmissions are known for their strength and versatility, making them popular among enthusiasts for restorations and upgrades․ The design emphasizes durability and simplicity, ensuring long-term reliability with proper maintenance․

Transmission Ratios and Performance Capabilities

The Chevrolet 4-speed manual transmission offers a range of gear ratios to suit various driving needs․ The M20 provides wide ratios, ideal for everyday driving, while the M21 offers closer ratios for enhanced performance․ The M22, known as the “Rock Crusher,” features heavy-duty close ratios, making it perfect for racing and high-torque applications․ The SM465 model includes a low 6․55:1 first gear and a direct 1:1 fourth gear, offering exceptional low-speed crawling and high-speed cruising capabilities․ These ratios ensure optimal performance across different scenarios, from off-road adventures to track racing․

The Muncie 4-Speed Transmission: A Detailed Analysis

The Muncie 4-speed transmission, built by General Motors from 1968 to 1991, features a robust cast-iron case and top-loading design, ensuring durability and strength for heavy-duty applications․

Muncie M20, M21, and M22 Variants: Differences and Applications

The Muncie M20, M21, and M22 are distinct variants of the 4-speed manual transmission, each tailored for specific applications․ The M20 is a wide-ratio transmission, ideal for everyday driving and light-duty trucks, while the M21 features a close-ratio design, enhancing performance in racing and high RPM scenarios․ The M22, known as the “Rock Crusher,” is a heavy-duty close-ratio transmission built for extreme durability and high-stress environments․ Each variant offers unique gearing and strength to suit different driving needs and vehicle types․

Identifying Muncie Transmissions: Codes, Serial Numbers, and Physical Characteristics

Muncie transmissions can be identified through specific codes, serial numbers, and physical features․ Early models (1964-1968) have shift arms attached via a stud and nut, while 1969 and later models use a bolt․ Side covers on early units feature a stud, while later versions have a hole․ The transmission’s serial number and RPO codes (M20, M21, M22) indicate the variant․ Physical characteristics, such as the wide or narrow ratio design, further distinguish these transmissions, aiding in accurate identification for restoration or replacement purposes․

Applications Across Chevrolet Models

The Chevrolet 4-speed manual transmission was widely used in trucks, SUVs, and performance-oriented cars like the Camaro and Corvette, offering durability and precise control across various models․

Chevrolet Trucks and SUVs Equipped with the 4-Speed Manual Transmission

Chevrolet’s 4-speed manual transmission was widely used in trucks and SUVs, including the iconic SM465, known for its durability and versatility in heavy-duty applications․ The SM465, produced from 1968 to 1991, featured a top-loading design and a robust cast-iron case, making it ideal for both on-road and off-road use․ Muncie 4-speed transmissions, such as the M20, M21, and M22, were also popular in Chevrolet trucks and SUVs, offering strength and reliability for demanding tasks․

Performance-Oriented Chevrolet Cars with the 4-Speed Option

Chevrolet’s 4-speed manual transmission was a hallmark in performance cars like the Corvette and Camaro․ In 1977, only 2,060 Corvettes were equipped with a 4-speed, making them rare collectibles․ The Muncie M20, M21, and M22 variants provided close-ratio gearing, enhancing acceleration and driver control․ These transmissions were integral to Chevrolet’s racing heritage, offering precise shifting and durability for high-performance driving experiences, making them sought after by enthusiasts and collectors of classic Chevrolet muscle cars․

Performance and Durability

The Chevrolet 4-speed manual transmission is renowned for its durability and reliability, offering robust performance in both heavy-duty trucks and high-performance vehicles, and easy maintenance․

Strengths and Weaknesses of the Chevrolet 4-Speed Manual Transmission

The Chevrolet 4-speed manual transmission is celebrated for its durability and strength, especially in heavy-duty applications, with a reputation for withstanding rigorous use․ Its wide availability and plentiful replacement parts make maintenance cost-effective․ However, its wide transmission case and limited gear ratios can be drawbacks in certain performance scenarios, and the SM465’s low first gear may not suit all driving conditions․ Despite this, its reliability and ease of repair solidify its legacy as a trusted manual gearbox․

Popular Modifications and Upgrades for Enhanced Performance

Enthusiasts often modify the Chevrolet 4-speed manual transmission to enhance its performance․ Common upgrades include swapping gear ratios for better acceleration or top speed, installing lightweight flywheels, and upgrading to high-performance clutches․ Strengthening the internal components, such as bearings and seals, can also improve durability under heavy use․ Additionally, aftermarket short-throw shifters are popular for quicker, more precise shifting․ For racing applications, enthusiasts may opt for the Muncie M22 variant, known for its close-ratio gears and heavy-duty construction․

Maintenance and Repair Tips

Regular fluid checks, gasket inspections, and synchronizer replacements are essential․ Lubricate bearings and inspect gear teeth for wear to ensure smooth operation and longevity․

Common Issues and Solutions for the Chevrolet 4-Speed Manual Transmission

Common issues include worn synchronizers, causing gear grinding, and leaks from the transmission pan gasket․ Replacing worn parts and sealing gaskets can resolve these problems․ Regular lubrication of bearings and inspecting gear teeth for wear are crucial for smooth operation․ Addressing these issues promptly ensures longevity and optimal performance of the transmission․ Replacement parts are readily available, making maintenance cost-effective and straightforward․

Parts Availability and Cost-Effective Maintenance Strategies

Parts for the Chevrolet 4-speed manual transmission are widely available due to its long production run and popularity․ Many aftermarket suppliers offer affordable components, making repairs and maintenance cost-effective․ Refurbished units and DIY repair kits are common, reducing expenses․ Regular fluid changes and inspections can prevent major issues․ Purchasing from reputable sources ensures quality and compatibility, while community forums and specialized shops provide valuable resources for owners seeking to maintain or restore their transmissions efficiently․

Collectibility and Market Value

Chevrolet 4-speed manual transmissions, particularly the Muncie and SM465 variants, are highly sought after by collectors and enthusiasts due to their durability and nostalgic appeal․ Rare models, such as the 1977 Corvette with a 4-speed, command premium prices․ The market demand for these transmissions remains strong, with restored units appreciating in value․ Their historical significance and versatility across Chevrolet’s lineup make them a valuable addition to classic car restorations and performance builds․

Rarity and Demand for Chevrolet Vehicles with 4-Speed Manual Transmission

Chevrolet vehicles equipped with the 4-speed manual transmission, such as the 1977 Corvette, are highly rare, with only 2,060 units produced․ The Muncie M22 heavy-duty variant is particularly sought after by collectors and restorers․ Demand remains strong due to their historical significance, durability, and nostalgic appeal․ Rare transmissions like the SM465, known for its low gear ratio, are prized by off-road enthusiasts․ As modern cars shift toward automatics, these manual transmissions gain value, making them a coveted find for classic car enthusiasts and performance builders․

Restoration and Value Appreciation of Classic Chevrolet Transmissions

Restoring classic Chevrolet 4-speed manual transmissions, like the Muncie M22, has become a popular endeavor among enthusiasts․ These transmissions, known for their durability, are sought after for both classic car restorations and performance upgrades․ As rare components, they appreciate in value over time, especially when meticulously rebuilt to original specifications․ Collectors and restorers often prioritize these transmissions due to their historical significance and the growing demand for vintage automotive components, making them a valuable investment for classic car enthusiasts․

The Chevrolet 4-speed manual transmission, like the Muncie, remains a sought-after component for collectors and restorers, blending durability with nostalgic appeal․ While modern automatics dominate, manual transmissions retain a niche following, ensuring the legacy of these iconic gearboxes endures in classic car culture and performance enthusiasts’ projects․

The Legacy of the Chevrolet 4-Speed Manual Transmission

The Chevrolet 4-speed manual transmission, particularly the Muncie, holds a revered place in automotive history․ Known for its durability and versatility, it equipped iconic models like the Camaro and Corvette, becoming synonymous with performance and driver engagement․ Enthusiasts and restorers continue to seek these transmissions, celebrating their mechanical simplicity and nostalgic appeal․ The Muncie’s strength and wide range of applications solidified its status as a cornerstone of Chevrolet’s heritage, enduring beyond its production era․

Modern Alternatives and the Future of Manual Transmissions in Chevrolet Vehicles

While the Chevrolet 4-speed manual transmission remains iconic, modern Chevrolet vehicles have transitioned to more advanced manual options like the 6-speed and 8-speed units․ These newer transmissions offer improved performance, fuel efficiency, and smoother shifting․ The Muncie’s legacy lives on in enthusiast communities, but Chevrolet now focuses on pairing contemporary engines with updated manual gearboxes․ The future may see manual transmissions in hybrid or electric powertrains, blending tradition with innovation to meet evolving driver demands and technological advancements․

Manuals

toto anti siphon 528 manual

Welcome to the Toto Anti-Siphon 528 Manual, your comprehensive guide to understanding, installing, and maintaining the Toto Anti-Siphon 528 fill valve. This manual provides vital information for optimal performance and troubleshooting, ensuring a smooth user experience.

Overview of the Toto Anti-Siphon 528 Fill Valve

The Toto Anti-Siphon 528 fill valve is a universal, quiet, and adjustable solution designed to fix slow refilling, running, and noisy toilets. Compatible with most Toto toilet models, it features a twist-lock adjustment for easy installation and optimal performance. Made by Korky and authorized by Toto, it ensures reliability and durability;

Key Features and Benefits

The Toto Anti-Siphon 528 offers a noise-reducing design, adjustable height, and universal compatibility. Its twist-lock adjustment simplifies installation, while the durable construction ensures long-lasting performance. Designed to fix issues like slow refilling and running toilets, it enhances water efficiency and provides a quiet operation, making it a reliable choice for Toto toilet systems.

Installation Guide

The Toto Anti-Siphon 528 fill valve is designed for easy installation. Simply remove the old valve, insert the new one, and adjust as needed. No tools required.

Preparation and Tools Required

Before installing the Toto Anti-Siphon 528, turn off the water supply and drain the toilet tank. Ensure the area is clear. No special tools are needed; the valve is designed for easy installation with a twist-lock adjustment feature. The fill valve is pre-adjusted, but height adjustments may be necessary for proper fit and function.

Step-by-Step Installation Process

Turn off the water supply and drain the toilet tank. Remove the old fill valve or ballcock. Insert the new Toto Anti-Siphon 528 fill valve, ensuring it fits securely. Adjust the height using the twist-lock feature. Connect the refill tube to the overflow pipe. Turn the water supply back on and test the valve for proper function.

Professional Tips for a Smooth Installation

  • Use genuine Toto parts to ensure compatibility and performance.
  • Adjust the water level carefully to avoid overflow or insufficient filling.
  • Secure all connections tightly to prevent leaks.
  • Test the valve after installation to ensure proper function.

Troubleshooting Common Issues

Identify and resolve issues like continuous running, weak flushing, or noise. Clean debris, adjust water levels, or replace worn parts as needed. Reference the manual for detailed solutions.

Identifying Common Problems

Common issues with the Toto Anti-Siphon 528 include continuous running, weak flushing, or loud operation. These problems often arise from debris buildup, improper water level adjustment, or worn-out components. Regular maintenance and proper installation are key to preventing these issues. Refer to the manual for detailed diagnostic steps and solutions.

Diagnosing the Cause of Malfunction

To diagnose issues with the Toto Anti-Siphon 528, start by checking the water level adjustment. If the water runs continuously, the level may be set too high. Inspect for debris buildup in the valve or refill tube. Faulty components like a worn-out seal or damaged valve seat can also cause malfunctions. Refer to the troubleshooting section for detailed guidance.

Solutions for Fixing the Toto Anti-Siphon 528

For continuous running, adjust the water level by lowering it below the overflow tube. Clean debris from the valve or refill tube using gentle methods. Replace worn-out seals or the valve seat if damaged. For noisy operation, ensure proper installation and adjust the refill rate. Refer to the manual for detailed repair steps.

Maintenance and Care

Regular maintenance ensures optimal performance. Clean the fill valve and surrounding areas to prevent mineral buildup. Inspect and replace worn seals or washers annually. Adjust water levels as needed for efficient flushing and to prevent running issues.

Routine Maintenance Tasks

Perform routine checks to ensure the fill valve operates efficiently. Inspect for mineral buildup and clean the valve annually; Check the refill tube for proper alignment and secure connections. Replace worn-out seals or washers to prevent leaks. Adjust the water level regularly to maintain optimal flushing performance and prevent continuous running.

Cleaning the Fill Valve and Surrounding Areas

Regularly clean the fill valve by soaking it in vinegar to remove mineral buildup. Disconnect the water supply and gently scrub visible debris. Use a soft cloth to wipe the surrounding areas, ensuring no harsh chemicals damage the components. Rinse thoroughly and reconnect the water supply to maintain optimal performance.

Optimizing Performance Over Time

Regularly adjust the water level to prevent overfilling and ensure efficient flushing. Clean the fill valve and surrounding areas to remove debris and mineral buildup. Check for proper alignment of the refill tube and flapper. Lubricate moving parts if necessary, and inspect for worn-out seals to maintain optimal performance over time;

Adjustment and Customization

Adjusting the Toto Anti-Siphon 528 is straightforward with its innovative twist-lock feature. Customize the refill rate and water level by sliding the top portion or turning the adjuster dial clockwise for precise control.

Adjusting the Water Level

Adjusting the water level in the Toto Anti-Siphon 528 is simple and efficient. To modify the water level, slide the top portion of the fill valve up or down. Ensure the lock ring is freed at the base before making adjustments. This feature allows precise control over water levels, optimizing flush performance and water efficiency.

Customizing the Refill Rate

The Toto Anti-Siphon 528 allows precise customization of the refill rate. By turning the adjuster dial clockwise, you can regulate the amount of water refilled after each flush. This feature ensures optimal water flow and performance, tailored to your specific needs for efficiency and reliability.

Advanced Settings for Specific Needs

The Toto Anti-Siphon 528 offers advanced settings to meet specific requirements. Adjustments can be made to the twist-lock mechanism for precise height customization. The fill valve is designed to adapt to various toilet models, ensuring optimal performance. For further customization, refer to the manual or contact Toto support for specialized guidance and resources.

Comparison with Other Fill Valves

The Toto Anti-Siphon 528 stands out for its quiet operation, universal fit, and ease of installation. It addresses common issues like slow refilling and noise, making it a top choice compared to other fill valves.

How the Toto Anti-Siphon 528 Stands Out

The Toto Anti-Siphon 528 excels with its universal compatibility, fitting most toilet models, and its innovative twist-lock adjustment for effortless installation. Its quiet operation and adjustable water level ensure efficient performance, while its durable design minimizes common issues like running or slow refilling, making it a superior choice in fill valves.

Pros and Cons Compared to Competitors

The Toto Anti-Siphon 528 offers a quieter operation, easier installation, and universal compatibility compared to competitors. However, it may require occasional cleaning to maintain performance. While its durability and efficiency are notable, some users find the adjustment process slightly complex compared to other fill valves on the market.

Why Choose the Toto Anti-Siphon 528

The Toto Anti-Siphon 528 stands out for its superior performance, silent operation, and universal fit. Designed to fix common issues like slow refilling and noise, it ensures efficient water usage. Its easy installation and compatibility with multiple toilet models make it a top choice for both homeowners and professionals.

Repair and Replacement

Repairing or replacing the Toto Anti-Siphon 528 is straightforward, with genuine parts ensuring optimal performance. Troubleshooting common issues like leaks or slow refilling can often be resolved with simple adjustments or part replacements, extending the product’s lifespan and efficiency.

When to Repair vs. Replace

Determining whether to repair or replace the Toto Anti-Siphon 528 depends on the issue’s severity. Minor malfunctions like debris buildup can be resolved by cleaning or adjusting the valve. However, if the valve is damaged or corroded, replacement is recommended to ensure long-term functionality and water efficiency, avoiding further complications and costs.

DIY Repair Options

For minor issues, DIY repairs are feasible. Cleaning the valve by flushing debris or adjusting the water level can resolve common problems. Replacing worn-out seals or gaskets is also straightforward. Ensure to follow the manual’s instructions and use genuine Toto parts for optimal results and to maintain warranty validity, enhancing longevity and performance effectively.

Genuine Toto Replacement Parts

Genuine Toto replacement parts ensure optimal performance and durability. Designed specifically for the Anti-Siphon 528, these parts guarantee compatibility and reliability. Using authentic components maintains the product’s warranty and enhances longevity. Always purchase from authorized dealers to avoid counterfeit items and ensure proper fitment and functionality, preserving the toilet’s efficiency and operation over time effectively.

Warranty and Support

Toto offers a comprehensive warranty program, ensuring product reliability. Dedicated customer support is available via phone or online resources, providing assistance with inquiries, repairs, and troubleshooting for the Anti-Siphon 528 fill valve.

Understanding the Toto Warranty

The Toto warranty ensures product reliability with a 24-month coverage period. It includes free delivery and support for defective parts. Customers can contact Toto’s customer support at 888-232-8916 for inquiries or assistance with warranty claims, ensuring a hassle-free experience for all Toto Anti-Siphon 528 users.

Customer Support and Resources

Toto offers dedicated customer support and extensive resources to ensure a seamless experience with the Anti-Siphon 528. Visit their official website or contact their support team at 1-800-528-3553 for assistance. Additional resources, including manuals and troubleshooting guides, are available online to help users optimize their fill valve’s performance and address any concerns promptly.

Registering Your Product

Registering your Toto Anti-Siphon 528 ensures warranty validation and access to exclusive support. Visit Toto’s official website or contact their customer service at 1-800-528-3553 to complete the registration process. Proper registration guarantees coverage and streamlined assistance for any future inquiries or maintenance needs.

Case Studies and Testimonials

Discover real-world success stories and testimonials highlighting the Toto Anti-Siphon 528’s effectiveness in resolving toilet issues, praised for its ease of installation and reliable performance by professionals and homeowners alike.

Real-World Applications

The Toto Anti-Siphon 528 fill valve is widely used in residential and commercial settings, solving issues like slow refilling and noisy toilets. Plumbers and homeowners praise its compatibility with various Toto models, including Drake and Eco Drake, ensuring reliable performance across different applications and improving overall toilet efficiency and user satisfaction significantly.

User Reviews and Feedback

Users praise the Toto Anti-Siphon 528 for its easy installation and quiet operation. Many highlight its effectiveness in fixing issues like continuous running or slow refilling, with some noting its compatibility with various Toto toilet models. Overall, positive reviews emphasize its reliability and performance, making it a top choice for both homeowners and professionals.

Success Stories

Homeowners and professionals share success stories where the Toto Anti-Siphon 528 resolved persistent toilet issues. A realtor in Calgary fixed recurring problems in rental properties, while a DIY enthusiast successfully replaced a faulty valve, restoring quiet operation. These anecdotes underscore the product’s reliability and effectiveness in real-world applications.

Environmental Impact

The Toto Anti-Siphon 528 promotes water efficiency through its eco-friendly design, reducing water waste and optimizing usage for a more sustainable solution.

Water Efficiency Features

The Toto Anti-Siphon 528 is designed to optimize water usage, reducing waste and promoting conservation. Its advanced fill valve ensures precise water control, minimizing excess flow. The adjustable design allows users to customize water levels, preventing overfilling and saving water with each flush. This eco-conscious solution aligns with modern water-saving standards;

Eco-Friendly Design

The Toto Anti-Siphon 528 features an eco-friendly design with a focus on durability and sustainability. Crafted from high-quality, long-lasting materials, it minimizes environmental impact. Its quiet operation and efficient water management ensure reduced noise pollution and water conservation, aligning with eco-conscious practices and promoting a greener lifestyle.

Reducing Water Waste

The Toto Anti-Siphon 528 is engineered to minimize water waste through precise fill level control and efficient flushing mechanisms. Its advanced design prevents overflow and ensures water is used optimally, helping to conserve this precious resource while maintaining superior performance and reliability in every flush cycle.

Technical Specifications

The Toto Anti-Siphon 528 features dimensions of 386x691x528 mm, crafted from high-quality ceramic materials. It ensures optimal performance with efficient water usage, designed for compatibility with various toilet models and systems.

Dimensions and Compatibility

The Toto Anti-Siphon 528 measures 386mm in width, 691mm in depth, and 528mm in height. Its compact design ensures seamless integration with various toilet models, including wall-mounted and floor-standing units. The fill valve is compatible with both G-Max and Power Gravity systems, making it a versatile solution for different toilet configurations.

Material Quality

The Toto Anti-Siphon 528 is crafted from high-quality, durable materials, ensuring long-lasting performance. Its stainless steel and ceramic components resist corrosion and wear, providing a robust structure. The valve’s construction is designed to withstand frequent use and harsh water conditions, maintaining reliability and efficiency over time.

Performance Metrics

The Toto Anti-Siphon 528 excels in performance, offering quiet operation and consistent water flow. Its adjustable design ensures precise control over refill rates, minimizing noise and optimizing efficiency. Built for reliability, it delivers superior performance compared to standard fill valves, making it a top choice for modern toilet systems.

The Toto Anti-Siphon 528 manual provides essential guidance for installation, maintenance, and troubleshooting. For further assistance, contact Toto support at 1-800-528-3553 or visit Korky.com for additional resources.

Final Thoughts

The Toto Anti-Siphon 528 fill valve is a reliable, efficient solution for toilet fill valve needs. Its easy installation, tool-free adjustments, and quiet operation make it a top choice. Compatible with various Toto models, it ensures optimal performance and troubleshooting ease, providing long-term satisfaction for homeowners seeking a durable and high-quality product.

Additional Reading

For further insights, visit the official TOTO website or consult the TOTO Parts Store for detailed guides and troubleshooting tips. Explore resources like Terry Love Plumbing for expert advice. Refer to the Korky 528GT manual for installation specifics and optimal performance of your Toto Anti-Siphon 528 fill valve;

Manuals

gravely manuals

Gravely manuals provide essential guidance for tractors, mowers, snow blowers, and more, offering owner’s, service, and parts manuals. Available online, they support modern and vintage equipment effectively.

1.1 Overview of Gravely Manuals

Gravely manuals are comprehensive guides designed for owners and operators of Gravely equipment. They cover a wide range of products, including tractors, lawn mowers, snow blowers, and garden equipment. Available in PDF format, these manuals provide detailed instructions for operation, maintenance, and repair. Users can access owner’s manuals, service manuals, and parts lists online, ensuring easy troubleshooting and optimal performance of their Gravely machinery.

1.2 Importance of Gravely Manuals

Gravely manuals are critical for understanding and maintaining equipment effectively. They provide detailed instructions for operation, troubleshooting, and repair, ensuring safety and optimal performance. Whether for tractors, mowers, or snow blowers, these guides are indispensable for users to maximize their machinery’s potential and lifespan. Accessing these manuals ensures compliance with manufacturer recommendations, fostering reliability and efficiency in various tasks.

Types of Gravely Manuals

Gravely manuals include owner’s, service, parts, and operating guides, each tailored to specific needs, ensuring comprehensive support for users.

2.1 Owner’s Manuals

Gravely owner’s manuals are essential resources for equipment operation and maintenance. Available for various models, they provide detailed instructions for setup, usage, and troubleshooting. These manuals ensure safe and efficient operation, covering features, controls, and maintenance schedules. Accessible in PDF format, they can be downloaded free from authorized platforms, serving as vital guides for optimal performance and longevity of Gravely equipment.

2.2 Service Manuals

Gravely service manuals are comprehensive guides for diagnosing and repairing equipment. They include detailed repair procedures, parts lists, and technical specifications. These manuals are designed for professionals and DIY enthusiasts, ensuring proper maintenance and troubleshooting. Available for download or purchase, they cover a wide range of models, providing clear instructions to restore equipment functionality and extend service life effectively.

2.3 Parts Manuals

Gravely parts manuals provide detailed diagrams and lists of components for specific models. They help users identify and order the correct parts, ensuring accurate repairs and maintenance. Available for download or purchase, these manuals cover a wide range of equipment, from tractors to mowers. They are essential for both new and vintage models, offering a comprehensive reference for maintaining and restoring Gravely equipment effectively.

2.4 Operating Guides

Gravely operating guides offer step-by-step instructions for safe and efficient equipment operation. They cover features, controls, and troubleshooting tips for tractors, mowers, and other machinery. These guides are available for free download or purchase and are tailored to specific models, ensuring users can maximize performance and maintain their equipment properly. They are essential for both new and experienced operators to ensure optimal functionality and safety.

Gravely Tractor Manuals

Gravely tractor manuals provide detailed instructions for riding, walk-behind, and convertible tractors, covering operation, maintenance, and repair. They ensure optimal performance and longevity of the equipment.

3.1 Riding Tractors

Gravely riding tractors, such as the 5000 Series and G Series, offer powerful performance for mowing, landscaping, and heavy-duty tasks. These tractors feature durable construction, versatile attachments, and user-friendly controls. Manuals provide detailed instructions for operation, maintenance, and repair, ensuring optimal functionality. They also include safety guidelines and diagnostic procedures, helping users troubleshoot issues efficiently. Whether for residential or commercial use, Gravely riding tractor manuals are indispensable for maximizing productivity and equipment longevity.

3.2 Walk-Behind Tractors

Gravely walk-behind tractors are known for their versatility and durability, suitable for various landscaping tasks. Models from 1936 to 1974 are highly sought after by collectors and enthusiasts. Manuals for these tractors include operating instructions, parts lists, and maintenance tips, ensuring proper functionality. Users can download PDF versions online, accessing essential information to keep their equipment in top condition and extend its lifespan effectively.

3.3 Convertible Tractors

Gravely convertible tractors offer versatility, combining the functionality of riding and walk-behind models. The 5000 Series is a prime example, with setup instructions available in dedicated manuals. These guides provide detailed operating procedures, maintenance tips, and parts lists, ensuring optimal performance. Manuals for convertible tractors are accessible online, covering models like the 8162-T and 8171-T. They are essential for troubleshooting and DIY repairs, helping users maximize their equipment’s potential;

Gravely Lawn Mower Manuals

Gravely lawn mower manuals are available for zero-turn, walk-behind, and stand-on mowers, offering user guides, service instructions, and parts lists. Free downloads ensure easy access for owners.

4.1 Zero-Turn Mowers

Gravely zero-turn mower manuals provide detailed guidance for high-performance commercial mowers. They include operating instructions, maintenance tips, and troubleshooting guides. Manuals are available for free download, ensuring easy access for owners to optimize mower performance and longevity. These resources cover various models, offering comprehensive support for both routine care and complex repairs, ensuring efficient lawn maintenance and extending equipment lifespan significantly.

4.2 Walk-Behind Mowers

Gravely walk-behind mower manuals offer comprehensive guides for operation, maintenance, and repair. They cover assembly, safety precautions, and troubleshooting for models with various engines like Briggs & Stratton, Honda, and Kawasaki. These manuals ensure users can maximize their equipment’s performance and longevity. Detailed diagrams and step-by-step instructions help owners diagnose and fix issues, keeping their mowers in optimal condition for efficient lawn care and maintenance.

4.3 Stand-On Mowers

Gravely stand-on mower manuals provide detailed operation and maintenance instructions, ensuring optimal performance. These guides cover safety features, engine specifications, and troubleshooting for models equipped with powerful engines like Kawasaki. They include diagrams for repairs and maintenance schedules, helping users extend equipment life and maintain productivity. Accessible online, these manuals are indispensable for professionals and homeowners seeking reliable lawn care solutions.

Gravely Equipment Manuals

Gravely equipment manuals cover a wide range of machinery, including tractors, mowers, and snow blowers. They offer detailed instructions for operation, maintenance, and repairs, ensuring optimal performance and longevity.

5.1 Snow Blowers

Gravely snow blower manuals provide detailed instructions for operation, maintenance, and troubleshooting. They include safety guidelines, parts lists, and repair procedures. These manuals ensure optimal performance during winter conditions, helping users clear snow efficiently. Available online, they cover various models, offering comprehensive support for both routine care and complex repairs. Accessing these manuals enables users to maintain their equipment effectively and extend its lifespan.

5.2 Garden Equipment

Gravely garden equipment manuals offer comprehensive guides for tractors, tillers, and attachments. They include operation instructions, maintenance tips, and parts lists. These manuals help users optimize garden care, ensuring productivity and longevity; Available online, they provide troubleshooting solutions and DIY repair guidance. Whether for small gardens or large plots, Gravely manuals are indispensable for both novice and experienced gardeners, ensuring efficient and effective equipment use.

5.2 Heavy Equipment

Gravely heavy equipment manuals provide detailed instructions for operating, maintaining, and repairing machinery. They cover models like tractors, mowers, and snow blowers, ensuring optimal performance. These manuals include parts lists, troubleshooting guides, and safety protocols. Available online, they cater to both owners and technicians, offering comprehensive support for heavy-duty tasks. They are essential for maximizing productivity and ensuring equipment longevity in demanding environments.

Historical and Vintage Gravely Manuals

Historical and vintage Gravely manuals offer insights into classic equipment, covering models from 1936 to 1974. These rare documents provide valuable information for collectors and enthusiasts, ensuring preservation and restoration of legacy machinery with detailed instructions and specifications.

6.1 Manuals for Models 1936-1974

Manuals for Gravely models from 1936 to 1974 are available, covering walk-behind tractors and other equipment. These vintage documents provide detailed setup instructions, service tips, and parts lists, essential for restoring and maintaining classic machinery. Available as free PDF downloads or online viewing, they offer invaluable insights into Gravely’s historical products, ensuring preservation and functionality for enthusiasts and collectors of legacy equipment.

6.2 Rare and Collectible Manuals

Rare and collectible Gravely manuals from early models are highly sought after by enthusiasts. These historical documents, often in PDF format, provide unique insights into vintage equipment operation and maintenance. Available through specialized platforms, they serve as valuable resources for collectors and historians, preserving the legacy of Gravely’s innovative machinery and offering a glimpse into the evolution of agricultural and lawn care technology.

Accessing Gravely Manuals

Gravely manuals are accessible online through various platforms, authorized dealers, and free download sites, ensuring easy availability for owners and enthusiasts to maintain and repair their equipment effectively.

7.1 Online Platforms

Online platforms offer convenient access to Gravely manuals, with many websites providing free PDF downloads. Popular sites include the official Gravely website, specialized forums, and repositories like the Internet Archive. These platforms host a wide range of manuals, from owner’s guides to service and parts manuals, ensuring users can easily find the documentation they need for their specific equipment.

Third-party sites often mirror original content, making manuals available even for vintage models. This digital accessibility ensures that both modern and historical Gravely equipment users can maintain and repair their machines effectively, supporting longevity and performance.

7.2 Authorized Dealers

Authorized Gravely dealers provide authentic manuals for tractors, mowers, and other equipment. These dealers ensure access to genuine documentation, including owner’s, service, and parts manuals. By registering your product with an authorized dealer, you activate warranties and gain access to exclusive support. Manuals are available in both digital and printed formats, ensuring comprehensive guidance for maintenance, repair, and operation. Dealers also offer expert assistance, making them a reliable resource for Gravely equipment owners.

7.3 Free Downloads

Gravely manuals are available for free download from various online platforms, including official websites and trusted repositories. Users can access PDF versions of owner’s, service, and parts manuals without cost. These downloads cover a wide range of models, from vintage tractors to modern mowers. Free downloads ensure easy access to essential information, enabling users to maintain and repair their equipment efficiently. This convenience supports DIY enthusiasts and professionals alike, promoting self-sufficiency and cost-effectiveness.

Understanding Gravely Manuals

Gravely manuals are comprehensive guides providing detailed instructions for operation, maintenance, and troubleshooting. They include clear diagrams and step-by-step procedures, ensuring users can effectively utilize and service their equipment.

8.1 Reading and Interpreting Manuals

Reading and interpreting Gravely manuals requires attention to detail. Manuals are structured with clear sections like safety guidelines, maintenance instructions, and troubleshooting. Users should familiarize themselves with diagrams and step-by-step procedures to ensure proper equipment operation. Understanding the content helps prevent damage and ensures safe, efficient use of Gravely tractors, mowers, and other equipment; Always refer to the manual for specific instructions tailored to your model.

8.2 Safety Guidelines

Gravely manuals emphasize safety guidelines to ensure safe operation. Always wear protective gear like gloves and eyewear. Familiarize yourself with emergency stop procedures and keep loose clothing tied back. Never operate equipment near children or pets. Adhere to weight limits and avoid uneven terrain. Regularly inspect equipment for damage; Follow all warnings and precautions outlined in the manual to prevent accidents and maintain equipment longevity. Safety is paramount for effective and risk-free operation.

8.3 Maintenance and Repair Instructions

Gravely manuals provide detailed maintenance and repair instructions to ensure optimal performance. Regularly check and replace oil, filters, and blades as specified. Refer to the parts list for correct replacements. Follow step-by-step repair procedures for common issues. Proper maintenance extends equipment lifespan and prevents costly repairs. Always use genuine parts and adhere to the manual’s guidelines for safe and effective servicing of your Gravely equipment.

Gravely Manuals for Specific Engines

Gravely manuals cater to engines from manufacturers like Briggs and Stratton, Honda, and Kawasaki. These guides provide troubleshooting, parts lists, and maintenance tips specific to each engine type for optimal performance.

9.1 Briggs and Stratton Engines

Gravely manuals for Briggs and Stratton engines provide detailed troubleshooting, maintenance, and repair instructions. These engines, known for their reliability, power Gravely tractors, mowers, and other equipment. Manuals include parts lists, diagnostic guides, and step-by-step repair procedures. They are essential for ensuring optimal performance, longevity, and safety of Briggs and Stratton-powered Gravely machines. Accessible in PDF format, these resources are vital for owners and technicians alike.

9.2 Honda Engines

Gravely manuals for Honda engines offer comprehensive guides for installation, operation, and maintenance. These engines, renowned for their efficiency and durability, power various Gravely equipment, including lawn tractors and zero-turn mowers. Manuals detail fuel recommendations, emission standards, and troubleshooting tips. They ensure optimal performance, reliability, and longevity of Honda-powered Gravely machines, providing essential resources for both owners and technicians to maintain safety and efficiency.

9.3 Kawasaki Engines

Gravely manuals for Kawasaki engines deliver detailed instructions for installation, operation, and maintenance. These engines, known for their high performance and reliability, power Gravely’s heavy equipment and lawn mowers. Manuals include fuel recommendations, emission standards, and troubleshooting guides, ensuring optimal functionality and longevity. They cater to both professionals and homeowners, providing clear, concise information to maximize efficiency and safety while adhering to manufacturer specifications and environmental regulations.